Posted on — Leave a comment

So what goes into creating a product to sell??

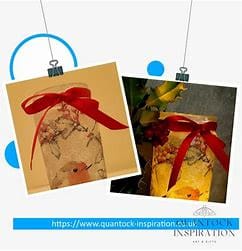
two images of recycled decoupage jars

I have been designing, making, marketing and selling my own product for a few years now. At Quantock Inspiration, there are now over two hundred items in the store.

But what actually goes into the whole process? Because it doesn’t take five minutes – it’s a darn sight longer than that!!

Most of you will know that I specialise in bottle crafts and decoupage is the main theme (to use paper napkins to decorate items using a glue or similar medium) So I will talk about a new bottle lamp design here.

Now, no one wants to tread on anyone’s toes – or at least, I don’t (there are plenty of copycats out there!)

If I see a napkin that I like the look of – be it a floral design or animal for example, I do try to make sure that I can’t find it anywhere else in the form that I am looking to produce. That takes a bit of time having a bit of a google (and a sip of Gin while I’m at it)

The next thought process, is what kind of bottle or glass colour would this napkin look good on?

It would be easy to just whack it onto a bottle, but it is not that simple. Some designs just don’t work on certain shapes or coloured glass.

I use mainly standard wine bottles with clear glass but I do have different shaped bottles with other designs on them, just because it didn’t look quite right on a standard bottle.

So, I’ve chosen my napkin and my bottle shape (or two) and I set about tearing the napkins main areas up and arrange it in a fashion that looks pleasing to me. Then I apply to the bottle, which can take a good hour, and leave it to dry.

Sometimes after it has dried, it doesn’t look so appealing – the colours I were expecting haven’t come out the way I’d hoped, or the napkin may have been too thick even though I only use the top layer and doesn’t look clear enough. In which case, it’s back to the drawing board – and the new creation is soaked and washed off ready to start again.

Let’s say it has come out as I have hoped. I can start thinking about what colour lights to put inside – some designs look good with warm lights – other’s look more dramatic with cold white lights. There are the multi-coloured lights to consider too.

Once the lights have been decided, the last thing to choose is the ribbon embellishment. I have a silly amount of ribbon in various colours and will try a selection until I have found the perfect one to match.

Now the product is finished, now it is time to list that item for sale. Selling online is much more challenging than say someone walking into a shop and being able to physically see and touch that product so really great photos are EVERYTHING!! And a good short video to match.

Now, I’m no David Bailey so learning how to showcase my product took a bit of trial and error and they were pretty rubbish to begin with!!!

Making sure my item has an appropriate background, making a styled scene and taking about twenty photos to show every aspect of that item takes up time. I would say that it takes about 20-30 minutes to take about fifteen photos. I will then take a short video of about fifteen seconds of the item too. For this, I use a rotating stand so customers can see all the way round the item.

Next it is time to choose which photos I want to use and edit them. To use them online, they need to be resized to the platform’s requirements or they simply won’t load on. I resize them all to 1244 pixels and then crop them as I see fit. I usually have to use a filter to lighten or darken the background so the product really stands out. Editing the phiotos can take anywhere up to an hour. I have good software on my phone and so I can achieve what I want quite easily.

Hold up! We are not finished. There’s the video to edit too and find some music to match. I use a free music site so I don’t get into any copyright trouble. On the video, I usually put some text on, explaining what the item is and the web address.

Now my product is ready to list for sale. On both my platforms, I use ten photos and one video. Writing an engaging description is very challenging. I try to be a bit witty about it and at the same time, create an image in the customer’s mind about where and how they can use this item.

I also describe the item thoroughly so there is no comeback on me if the customer cannot be bothered to go through the description. I write it out on word first and save it until I’m ready to go onto the platform and upload it.

Writing a good description can take up to an hour – yep – I bet you thought all this online selling was a doddle!! We are now well into our fourth hour of creating a new product for sale.

Now it’s time to get the item listed for sale. I list on two sites and each is done separately. Listing the item takes about 10-15 minutes. I upload the photos and video, give my item a title, copy and paste in my description, set a price and quantity and bingo! Well not quite. I have to create a shipping profile to go with my item and then think of some tags to assign to that item. Tags are basically keywords that a customer may use to try and find a product that they want. I usually come up with about twenty or so, which can be a bit thought provoking – you need to put your self in the shoes of your customer.

So, I have listed my item for sale and hit the submit button – now my item is live and ready for someone to buy. The process so far has taken about five and a half hours.

Only there’s just a bit more to do, It’s not done yet! Marketing!! My favourite part – not. But it is a necessary evil.

To market an item can take a silly amount of time – there are so many platforms I use to do it on – I have seven social media platforms and also a YouTube channel. There are apps that I can use to help me generate posts daily if I set them up. However, Initially I have to introduce them to each platform, using the photos and video and a load of hashtags to match. I can usually do Instagram and Facebook together, but the others have to get done separately. I keep it short and concise – I let the photos and video do the talking, leave a link for the customer and post away. This can take me another hour to do once I have gone through all of the platforms.

So there you have it – it takes quite a while to create a new item from scratch to marketing point – almost a whole day’s work just for one item. The same process counts for most of my other items – the knitwear, Mugs, jewellery for example.

I do struggle to find the time to actually get the items listed – I have lots that I have made and are ready to go. I fit it in and around processing the orders.

Wouldn’t it be fab if I had an army of people to assist!! But it’s just little old me – but I love it. There’s no greater satisfaction than to create something that someone will fall in love with, purchase it for themselves, their home or for a gift and for them to love it when they receive it!

And if they leave me a banging review – my job is done!!!
Posted on — Leave a comment

An interview with Esther Parr

An Interview with Esther Parr of Quantock Inspiration by Alura


  1. Introduce your business and tell us your story. How did you begin your business, decide what to sell, and how do you create/source your products? 

Hi, I’m Esther and I am the owner and creator of Quantock Inspiration. I make and sell handmade items, specialising in decoupage bottle crafts.

I live in the Quantock hills in Somerset, UK and the idea formed after becoming rather disillusioned with being a Police officer. I have always enjoyed making things and drawing so I decided it was time for a complete career change. I am lucky that I had such a supportive Husband so I was able to leave my Job and focus on what I wanted to do.

 At first it didn’t occur to me (or even know about) selling platforms. I had created a facebook page, didn’t have the faintest idea what I was doing, but one of my friends saw something in my creations, and suggested I opened an Etsy shop. I like to recycle as many items as I can and like to have a countryside feel to my shop, hence the name ‘Quantock Inspiration’ I opened my shop in May 2019.

At first, I was making all sorts of silly knick knacks and stuff and I didn’t know what I really wanted to focus on – I wanted to make a variety of things!!. I am prepared to admit that I went into it, totally blind and oblivious on what I needed to do to get noticed and make that first precious sale.

As I said before, I like to recycle and some of my original products were made using things that I found on the beach for example – like shells, interesting looking pebbles etc, but then I really got into decoupage. I buy a lot of my materials off of other Etsy sellers, like the napkins and my local craft stores, everything else is recycled. I use old newspapers for packaging for example although I buy my packing boxes brand new. I make and sell lots of different things but my main niche products are my decoupage wine bottle lamps.

After a couple of years selling on Etsy, I decided that it was time to get my own website.

That was a challenge in itself, as I knew NOTHING about building a website so it was all very much trial and error. I could not afford to hire a web builder so I had to learn everything myself and I was also very fortunate to have a close living neighbour who knew a lot about this sort of thing and was a huge help (I am forever grateful Kelly!)


  1. What are your favorite items listed in your shop? Why are these your favorite? Are these selling well, if so, why do you think that is the case? Please add links, we’ll feature these products!

I love my Bottle lamps and I am always looking to grow the line that I have. I also love the knitwear that I have created and jewellery. I have such a variety of things, it is hard to pick things out. I sublimate, I print using Pyrograhy too and although I sell these items, it is much less frequent than the bottle crafts. I make sure that the bottles are really unique, I research the market to make sure I am not doing a design similar to someone else’s. I also love my wood slice decoupage coasters, and they sell well.


  1. How long did it take for you to earn your first sale and how do you currently attract customers to your online store?  

It took a couple of months to get my first sale. It was quite something and I panicked!! However, I got the item to the customer and suddenly felt like I had got onto the bottom rung of the ladder. It was slow going – I basically didn’t know anything. I had to learn from scratch. I read every article I could find online and learnt about SEO, and social media marketing. I read lots of books on my kindle every night about selling, starting your own business, marketing strategies, it just went on and on. I also wanted to build my own website too. Talk about running before I could walk! I signed up to Erank (and now Alura) in order to find out more on SEO and improve my shop. It is also good for tracking my competitors. Things really took off during the pandemic. I had more time to devote to it as we couldn’t go anywhere, and everyone took to buying things online. Reviews are everything too, it gives others the confidence in your product so are much more likely to make that purchase if there are some stonking comments attached to it. I also like to give great customer service and build a rapport with my shoppers.

Today I use just about every main social media platform there is and in the early days it was a hard slog, creating the content, posting daily and trying to build up a following. 

Christmas is a particularly busy time for me – everything pretty much takes a back seat at that time of year as it is really full on.

I use Outfy to auto generate posts now as it saves me so much time. I can link all my platforms together, so I don’t have to spend time on each one. Marketing is a full-time job – and I don’t have the full time hours to devote to it. Thankfully I have reached a point where I have regular daily sales, so it is not a disaster if I don’t do any marketing that day.

Occasionally I use Facebook Ads when I think I need a bit of a boost.


  1. Tell us about how you manage your shop. Is it only you? What tools and apps do you use to run your store? How do you handle shipping and fulfillment?


I am a one women outfit, so I have to do everything. I make, market and pack/send my own product in my living room. I use my mobile phone for my photography and use the editing suite on my phone to create great images for my listings. I have a 12 year old daughter who needs my time and a small holding with a variety of animals that also require my attention each day so it is great that I can work my job around all of that. Occasionally my daughter likes to earn some extra pocket money so will help me with the packing. I use Royal mail click and drop which is fab. I print my own labels at home onto gummed paper and print my own packing slips. Using click and drop also gives me a tracking code so I can make sure every parcel gets to the recipient – I haven’t had one get lost yet! My local sorting office is only ten minutes away and on the way to my daughter’s school, so I drop all my parcels there daily – they are also open Sunday which is a bonus. The click and drop app also does a collection service but I like to try and do same day posting where and when I can. I use the Shopify inbox app, mainly just to keep track and reply to any customers if I am away from home. I prefer to use my laptop for most of it. I also have the shopify app too so I can keep up to speed if I am away from home.

I never go anywhere without a load of business cards as people are always asking what I do.

Each customer that makes a purchase is sent a discount coupon off of their next purchase. I get a lot of repeat buyers this way. I make sure the abandoned cart email automation is on too that offers a little incentive for them to complete their purchase.


  1. What goals do you have for your shop in the future?

I have got to the point where I have plenty of sales to keep my busy. I am satisfied with the income that I have and know that I can increase it easily if I wanted to. But that will come later on, I have to devote time to my family and have a little downtime to myself. I don’t believe in working 12 plus hours everyday. My shop is open 7 days a week as it is and as I mentioned before, the time running up to Christmas from October can be ridiculous. I don’t think I would get overwhelmed if it was like that all year round!

What I would like to achieve though is maybe to expand in the form of being able to employ a person or two – then I think the opportunities would really come into play.


  1. What’s your advice for a new seller starting an online store?

My advice to new online sellers is to do your homework first. Learn about SEO, marketing, photography and how to write great descriptions. Understand your target audience. Utilise as many tools as possible that will suit your kind of shop. Read books about online selling and don’t be afraid to ask questions. Maybe if I had done all that before I got going, I would have found it so hard and such a mystery!! 

I am a great believer in ‘if it aint broke, don’t fix it’.  Once you are creating daily sales at the rate you are happy with – leave your listings alone if they are performing well for you. I believe too much tweaking and fiddling seems to upset the algorithm and can stop the flow altogether. 

It is a hard slog and I have gone back to the beginning a few times now and it has been a huge learning curve. However, it is important not to give up – you will get there and when you do, I can’t describe the rewarding feeling and sense of achievement it gives you.


Posted on

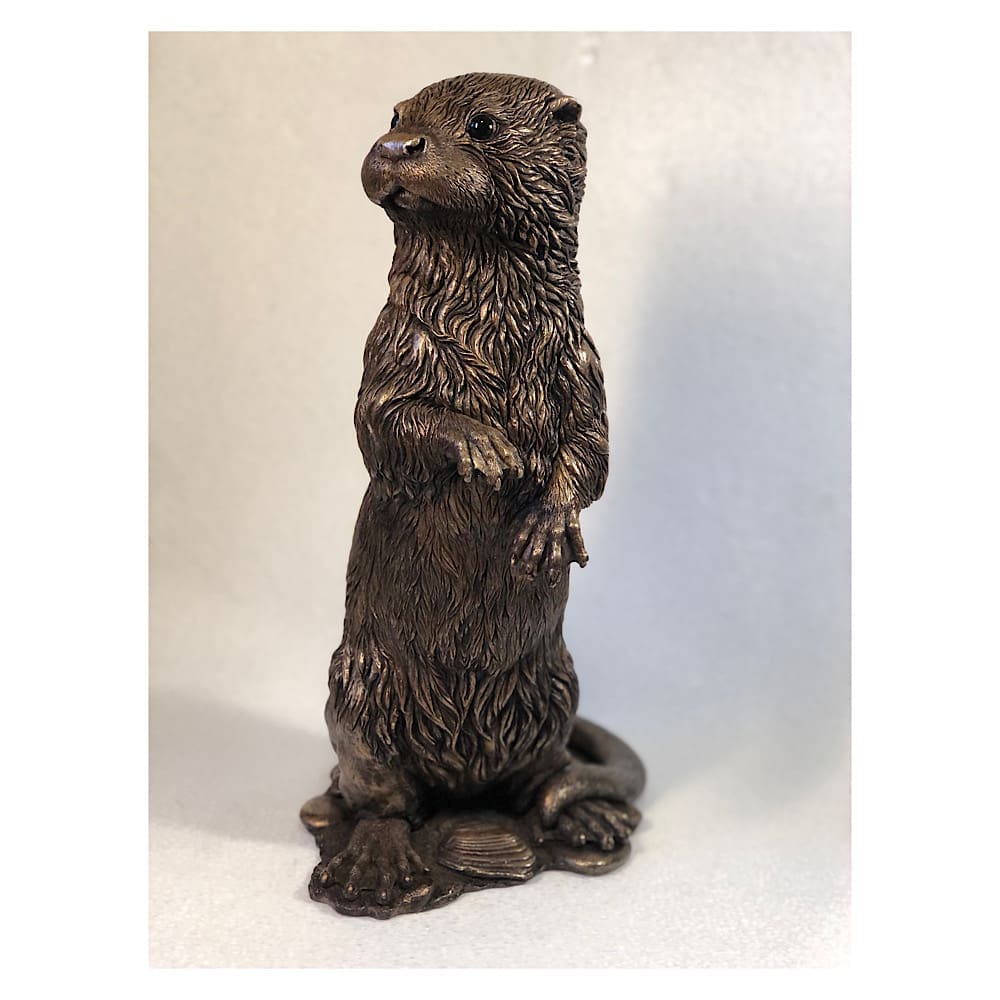
My bronze standing Otter Sculpture is now available!

Large Bronze otter figurine by Kirsty Armstrong Sculpture

The latest piece to come from my studio is a bronze standing Otter sculpture… called ‘Erik’. 

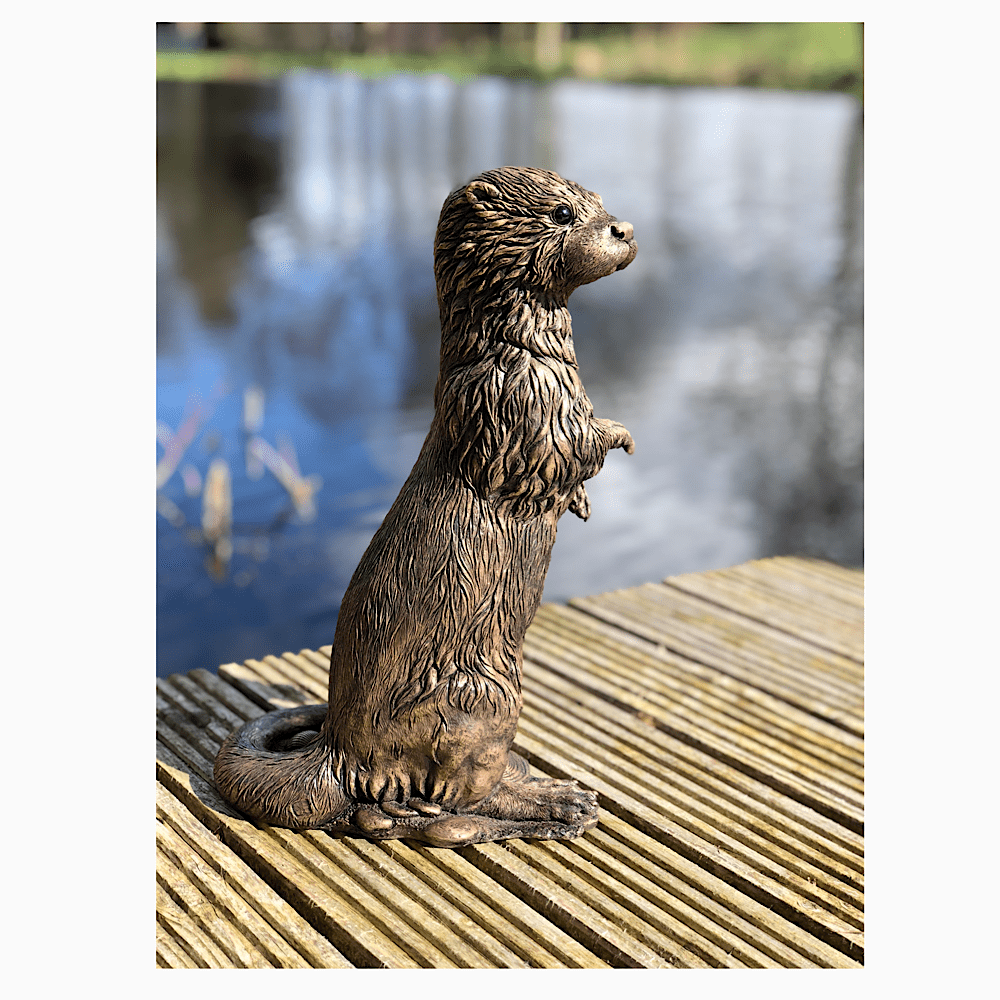
Realistic and detailed Bronze standing Otter sculpture by Kirsty Armstrong Sculpture next to a lake
Bronze Otter sculpture

Why ‘Erik’?…

‘Erik’ has been named after my Grandfather, and also the name gives a nod to my recently discovered ancestral VIKING heritage! 

How was ‘Erik’ made?…

I made the original wax Otter sculpture completely by hand using traditional sculpting techniques. It was then taken to be moulded and cast in the Cumbrian Lake District. 

The Otter Sculpture is now in production as a limited edition of 300 pieces, cast in small batches to order, in four different finishes. Erik is available in cold-cast bronze, iron, and pewter, as well as a metal-rich lacquer bronze with a verdigris patina.
You can watch the first bronze Erik being brought to life in my workshop in this short YouTube clip HERE

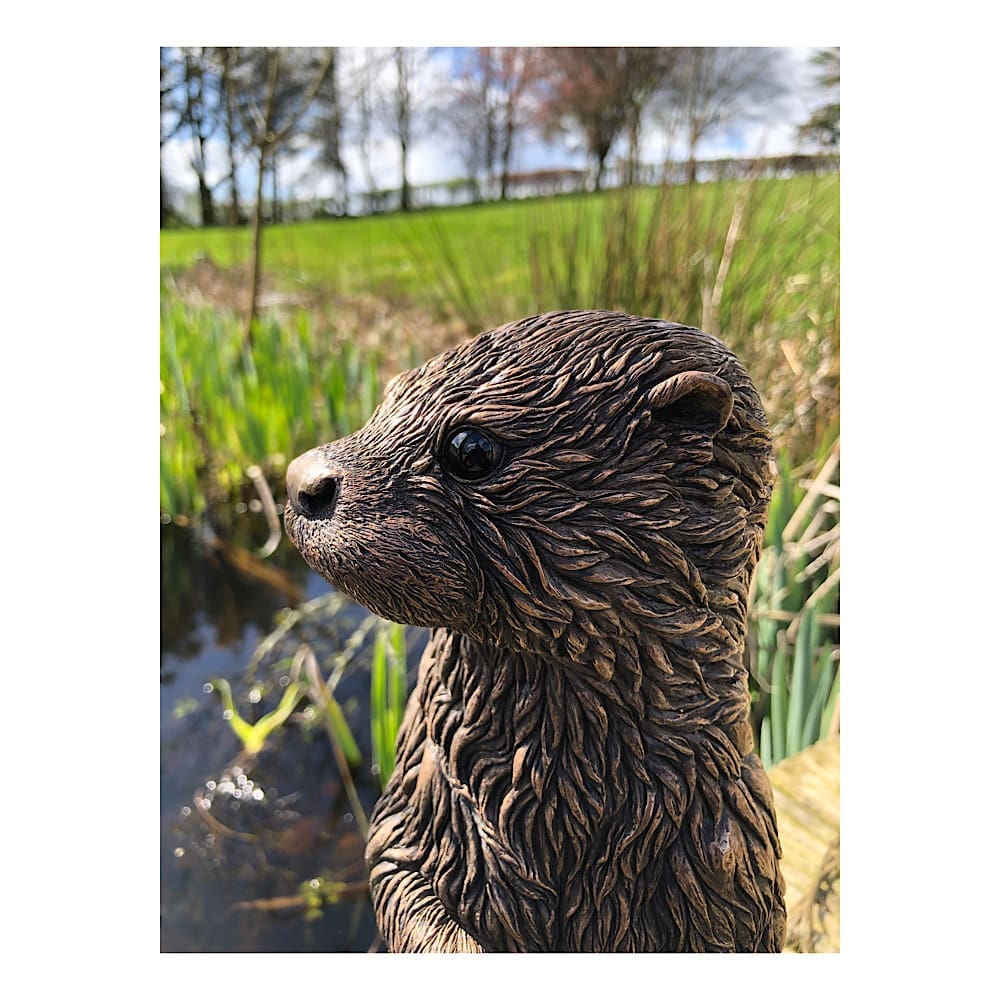
Close up of the bronze otter sculpture by Kirsty Armstrong
Erik the otter in bronze

The Shetland connection…

I lived on Shetland as a child, where there is still a population of European Otters. The Hillswick Wildlife Sanctuary is the only Wildlife sanctuary on Shetland, and they rescue injured and abandoned Otters and seals. They provided invaluable reference material for me during the sculpting of ‘Erik’, and so I’ll be donating an amount to them for every 25 Otter sculptures sold. 

This month I will be travelling up to Shetland with two bronze Otter Sculptures, one of which will live at Hillswick. 

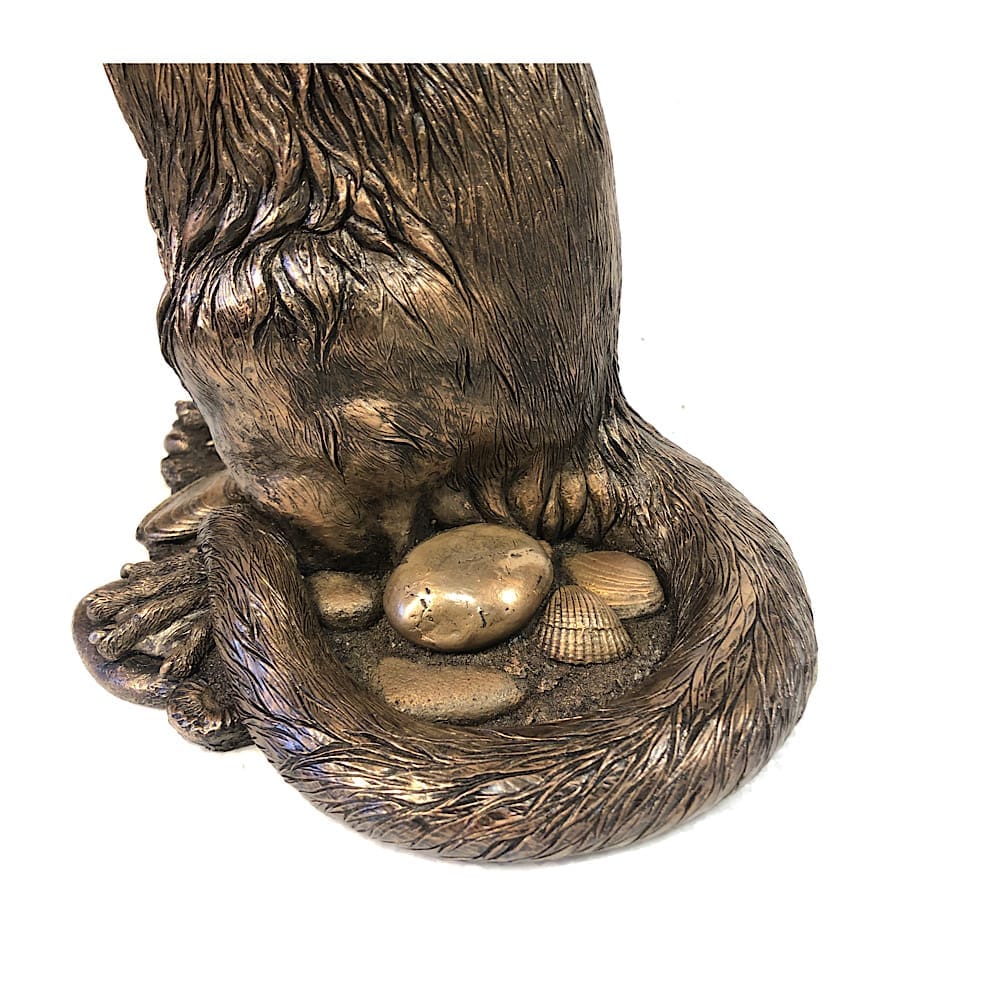
As a child I played on  Shetland’s beautiful ‘Spiggie beach’, and so I managed to incorporate a little bit of Spiggie sand onto the original sculpture’s base, which has been reproduced on each piece. 
Details on Erik the otter, a sculpture by Kirsty Armstrong Sculpture
I was also given a number of clam fossils by one of my followers, and so these have been incorporated into the sculpture’s base as well. 
Please find the listing for the Bronze version of the Otter sculpture in my ‘Just Kirsty Sculpture and Gifts’ shop on the British Craft House.  The other versions of ‘Erik’ will be available here very shortly. 

Thank you for reading! 
Kirsty 

Posted on

Caring for your Silver Jewellery

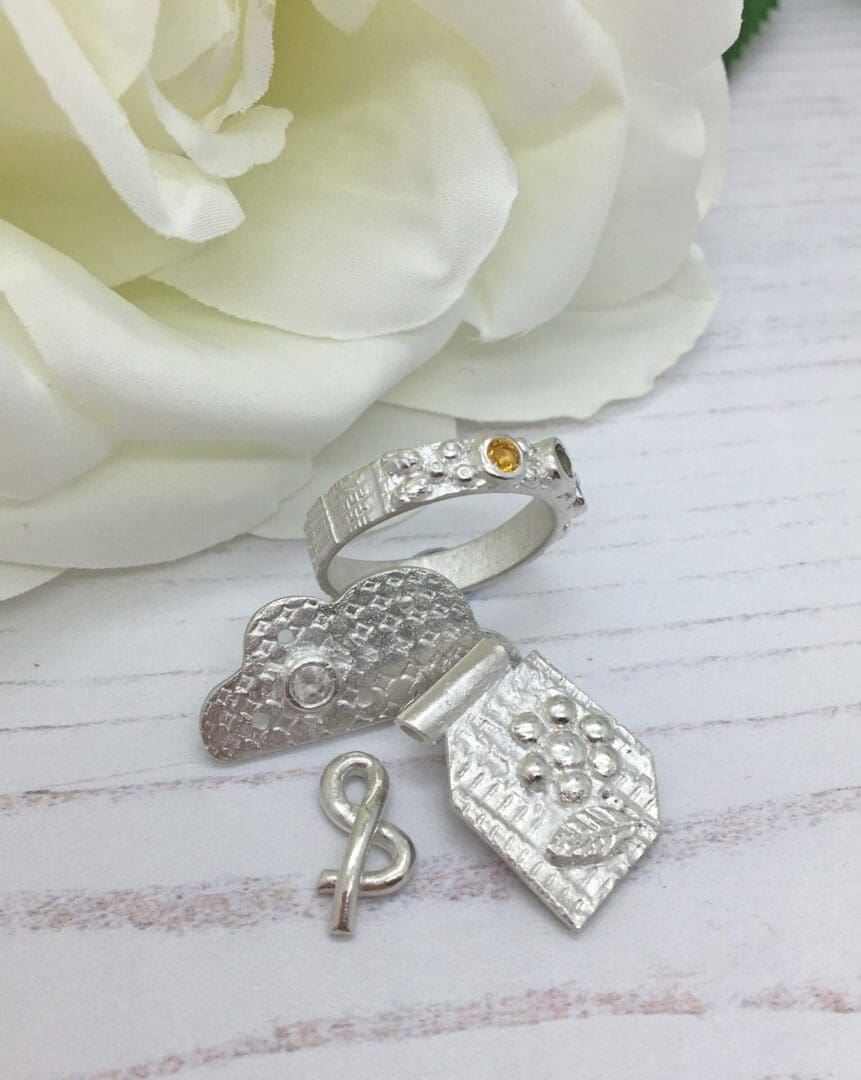
Fine silver pieces of jewellery

Caring for your Silver Jewellery

At Jewellery by Linda I create every item with the utmost care and love and I package your jewellery personally, taking the same care, to ensure that it leaves me in tip top condition.  Silver jewellery should stay looking beautiful for years to come so long as you take care of it. 

Precious metals tarnish due to oxidisation – like a cut apple when it turns brown.  This happens when it is exposed to oxygen (which is obviously in the air), but don’t stress.  Just follow a few simple steps to prevent a build up of tarnish:

·           When you invest in silver jewellery don’t save it for best! The tarnishing tends to get worse more quickly if you don’t wear it.

·           Take care not to get lotions and sprays on your jewellery – make your jewellery the last thing you put on (even after perfume) and the first thing you take off.

·           Always remove your jewellery before bathing, swimming, sunbathing or going into a hot tub.  Silver jewellery is particularly prone to tarnish and damage from pool chemicals, solvents, cleaning products and acetone.

·           Always remove your jewellery before you go to bed.

·           Store your jewellery separately in a sealed bag so that it doesn’t tangle, and away from sunlight.

If your jewellery becomes a little dull, just mix a few drops of mild dish soap with warm water and use the solution on a soft cloth to gently rub the item, rinse with clean water and buff with a dry soft cloth to dry it.

If your jewellery does become tarnished, simply use a silver cleaning cloth to bring it’s personality back.  Avoid harsh chemicals with gemstone jewellery as sensitive gemstones may be damaged.  The mild dish soap solution should be fine for most gems.

Posted on

Hallmarking in UK – Sterling Silver

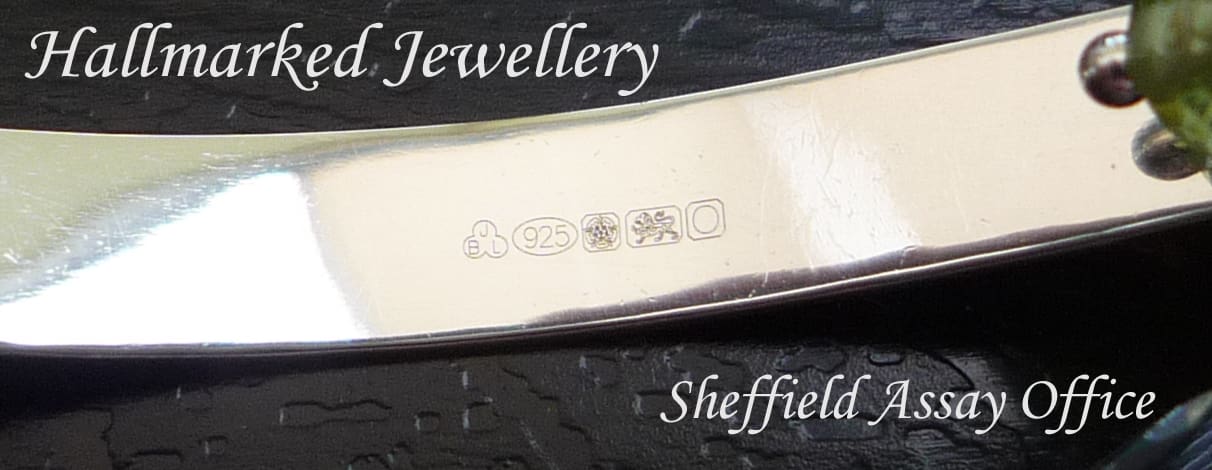
Jewellery by Linda Assay Marks

Jewellery by Linda hallmark

By law in the UK, silver items are required to be hallmarked at a recognised Assay Office if it is over the weight of 7.78g.

At Jewellery by Linda I choose to have certain items hallmarked even if they are under that weight.  I make sure to tell you in the product description if the item is hallmarked.


As a proud Yorkshire based creator, when I require an item hallmarking I send it along to the lovely people at Sheffield Assay Office – where else?


In the hallmark shown above this is what each symbol means (left to right):

  • Sponsor mark – this is my own Jewellery by Linda registered makers mark and shows the item was made by me.
  • The fineness/quality mark – in this case showing that the item is sterling silver (i.e. 925 – that is 92.5% silver content)
  • Yorkshire rose – this shows that the item was hallmarked in Sheffield
  • Lion passant – this shows that the item was made in the UK
  • Date mark – this changes each year and, obviously shows when the item was hallmarked.

The sponsor mark, fineness mark and Assay Office mark are compulsory with any item which is hallmarked. The lion and the date marks are voluntary but I like to include them.

You can view the Assay Office Dealers Notice Dealers_Notice_B

Posted on — Leave a comment

It’s been an amazing year….

my shop banner
Chris Stone wins Brownston Gallery Fresh Talent Award
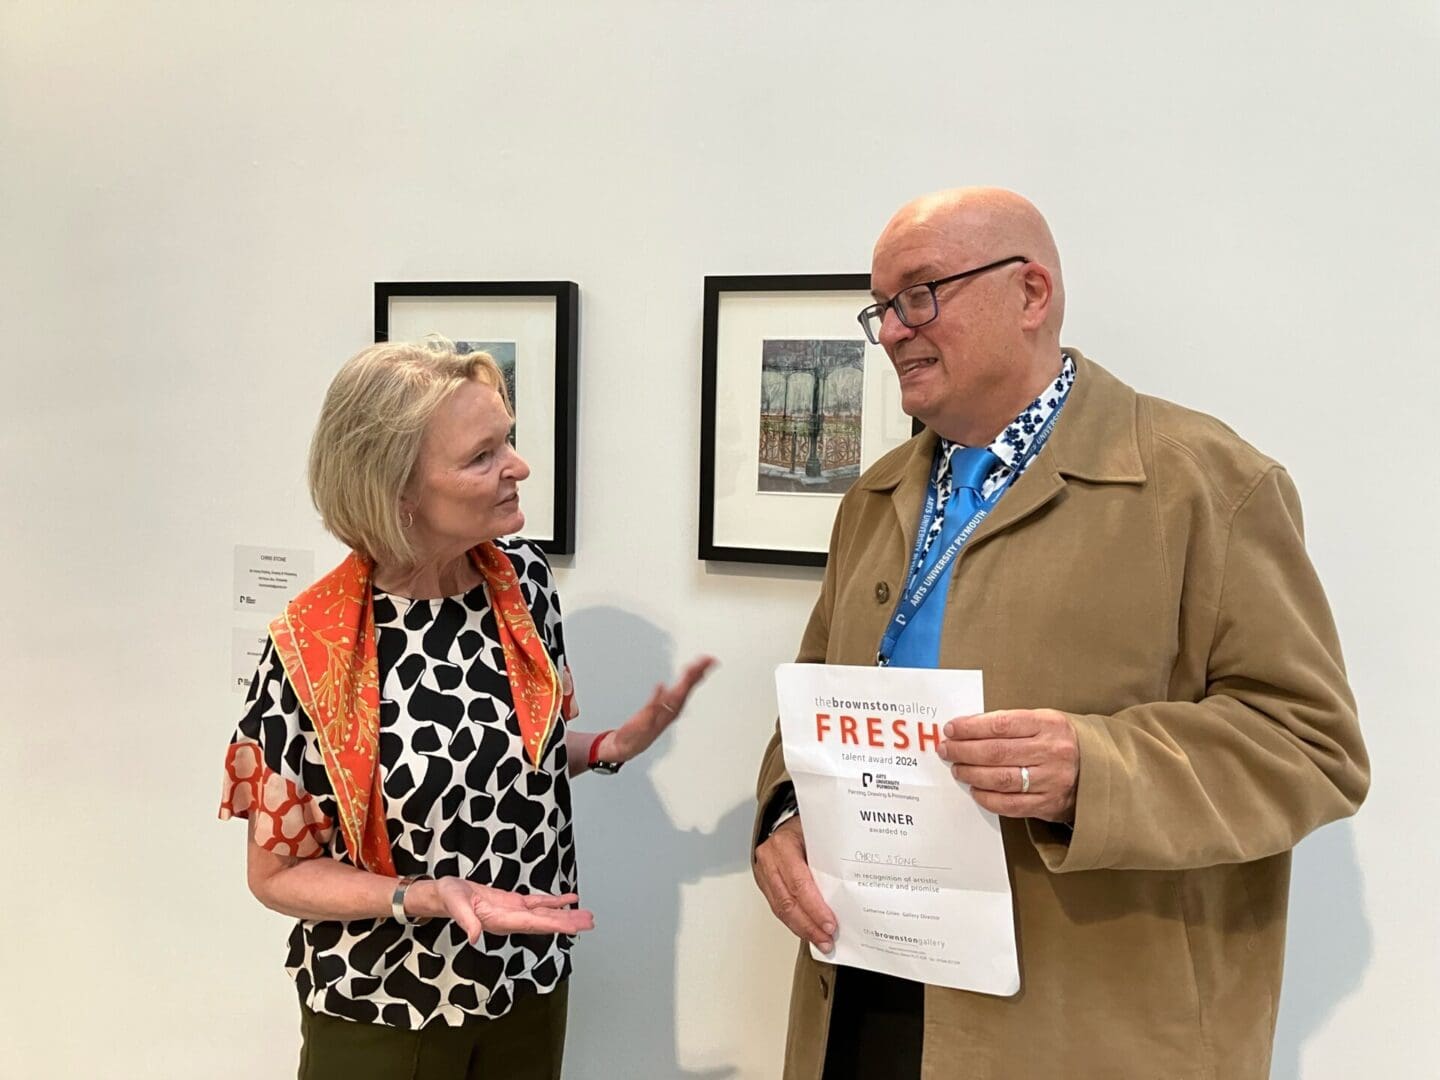
Picking up my award at my degree show


An Amazing Year So Far!


Having now completed my studies, I am thrilled to have  been awarded a first class BA honours degree in Painting Drawing and Printmaking from Arts University Plymouth. To achieve this at the age of 59 is amazing..you are never too old to learn new tricks or embark on a new adventure. If that weren’t enough, I was absolutely thrilled to be given the Fresh Talent Award from the prestigious Brownston Gallery in Modbury, Devon at my Graduate Show. As a result, I now have the opportunity to present a solo exhibition at the gallery next year.


Mature students can and do achieve so much from the university experience. Age really is no barrier!


If you would like to follow my progress as I prepare for the exhibition, you can sign up to my newsletter here.

A link to my very first newsletter is available here. It contains a discount coupon code for a 15% discount on original art in my British Craft House Shop until 31sr December 2024. 

Posted on

First Ever Blog!

Profile pic for blog Sea&Shore Art

Three years ago, my sister gave me a beautiful hand decorated oyster shell. It was love at first sight! I looked at this simple and delicate piece of art and thought I need to know more!  

So here we are, started with making them for friends and then for friends of friends! So I wondered if this could be my retirement hobby! I found this wonderful home of craft and thought I would give it a go!

Until now, I didn’t know much about oysters…..who does?!  So here’s a very brief intro to the wonderful world of oysters!

They can live until they are 30 years old

They take 3 years to reach maturity 

An oyster has colourless blood and breathes like a fish

The best time to eat British oysters in September – April, they spawn in the summer

The biggest oyster caught so far….14” long and weighed in at 1.5kgs – a beast!

Finding a pearl is very rare but finding a pea crab isn’t.  Yuk! 

The tastiest oysters come from Whitstable in Kent but Devon, Dorest and Essex are also yummy. Chew to get the full flavour.

The dark spot on an unprocessed shell is where the live oyster was attached to its shell.

You can make jumpers from oyster shells! Yep! Very eco friendly!

So that’s it in an oyster/nut shell….sorry😀 I hope that demystifies the secret world of oysters!

Until my next blog, take care and see you soon

Sarax

Posted on — Leave a comment

The Butter Board Trend.


Butter Board Recipe


Prep Time: 10 minutes


Cook Time: 5 minutes


Total Time 15 minutes


Serving size: 4-5

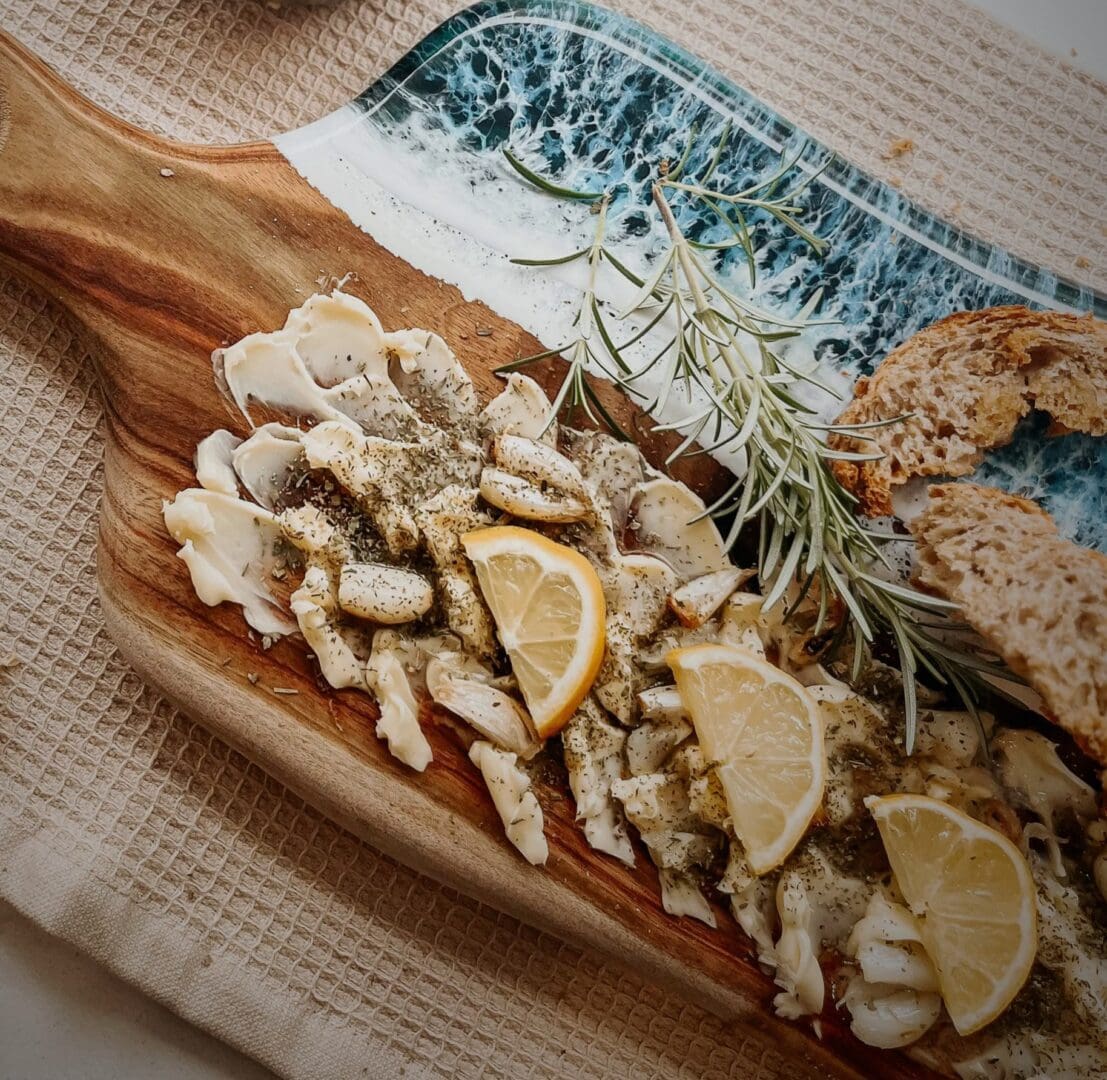
This season’s trending butter board is a super easy way to jazz up any meal. Just grab some garlic, your fave herbs and bread from your local store, grab some butter out of the fridge and you’re good to go!


INGREDIENTS

Butter

1 Whole Garlic


Mixed Herbs

Sourdough bread (your choice of bread) I got mine from Local Iseworth Town Market. The Old Isleworth Town Market Stall, From Brenda. 

Ingredients:

salt


lemon & thyme for garnish


METHOD

1) Cut the top of the a whole garlic, drizzle with olive oil and sprinkled with mixed herbs

2) Sliced Bread into 4-6 pieces and drizzle with olive oil

3) Place the oiled and herbed garlic and bread in the airy fryer/ oven and bake for 6-8 minutes at 180c (garlic might need more if it’s still hard)


4) Using a butter knife spread the butter on the board – we recommend using our Medium Size Paddle Board for this recipe.

5) Once the garlic is soft enough, squeeze out (use tea towel, it can still be hot) and spread on top of the butter

6) Add pinch of salt and mixed herbs on top

7) Add toasted bread on the side. Start dipping or spreading the butter on the bread and enjoy!


Garnished with your choice of herbs. I like mine with garlic and lemon. But you can also add Thyme to the mix.