Posted on — Leave a comment

Candle and Diffuser Safety and Care

Candle Safety

  • Always put candles on a flat, heat resistant surface. Be especially careful with night lights and tea lights, which get hot enough to melt plastic.
  • Put them in a proper holder. Candles need to be held firmly upright by the holder so they won’t fall over. The holder needs to be stable too, so it won’t fall over either. Ensure soy candles without a glass container are burned on a flat based, heat resistant surface, such as a ceramic plate, that is large enough to catch the melted wax.
  • Position them away from curtains. Don’t put candles near curtains or other fabrics – or furniture. Keep them out of draughts.
  • Don’t put them under shelves. It’s easy to forget that there’s a lot of heat above a burning candle. If you put it under a shelf or other surface then it can burn the surface. Make sure there’s at least three feet (one metre) between a candle and any surface above it.
  • Keep clothes and hair away. If there’s any chance you could lean across a candle and forget it’s there, put it somewhere else. You don’t want to set fire to your clothes or your hair.
  • Keep children and pets away. Candles should be out of reach of children and pets.
  • Keep candles apart. Leave at least four inches (10cm) between two burning candles.
  • Take care with votive or scented candles. These kinds of candles turn to liquid to release their fragrance, so put them in a glass or metal holder.
  • Don’t move them when they’re burning. Extinguish candles before moving them. Also, don’t let anything fall into the hot wax like match sticks.
  • Don’t leave them burning. Extinguish candles before you leave a room. Never go to sleep with a candle still burning. And never leave a burning candle or oil burner in a child’s bedroom.
  • Use a snuffer or a spoon to put them out. It’s safer than blowing them, which can send sparks and hot wax flying.
  • Double check they’re out. Candles that have been put out can go on smouldering and start a fire. Make sure they’re completely out.
  • Trim the wick to 5mm before lighting
  • Do not burn for more than 4 hours continuously.
  • Do not use the candle when less than half an inch of wax remains.


Candle Care

When burning your candle for the first time, allow the wax to melt to the edges of the glass. This is especially important on the first few burns to avoid ‘tunnelling’. 

Trim the candle wick to 5mm before every burn, this will prolong your candles life and ensure a safe and steady flame. 

Avoid burning your candle for more than 4 hours at a time and never leave a burning candle unattended. 

Keep out of reach from children and pets. 


Reed Diffuser Care and Safety

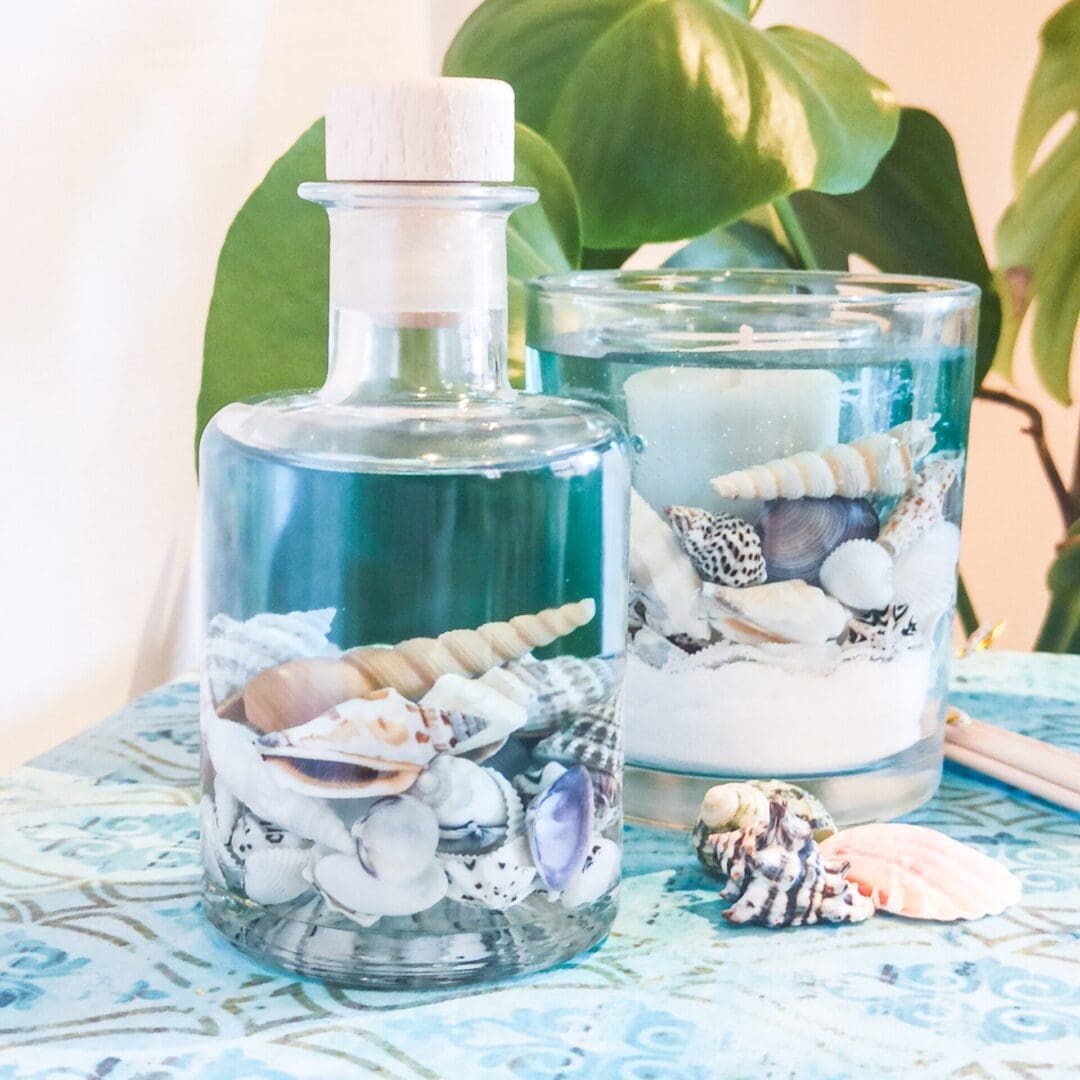
Place the reed diffuser bottle on a flat surface and gently remove the cork stopper. Insert the reeds and your diffuser is ready.

Flip the reeds if you notice the fragrance becomes weaker. This can also be done around 6 hours after first opening your diffuser.

Large rooms may require more than one reed diffuser.

Keep the diffuser out of reach from children or pets.

Do not ingest or ignite the fragrance oil. Do not light reeds.

Do not place directly onto polished, painted, plastic or leather surfaces or on electrical equipment as this may cause damage. Hygge & Hearth do not accept  responsibility for any damage.

People with fragrance sensitivity should be cautious when using these products and it is recommended to wear gloves when handling used reeds.

The botanicals and fragrance may cause the oil to change colour.


Shell Trinket Dish

Dishes are intended as decorative items only, not suitable to burn wax melts or use as a candle holder.

Clean using a dry, soft cloth.

Keep away from fire.

Not dishwasher safe, keep away from damp or areas of high humidity.

Not suitable for serving hot food. Fine for sweets, candy, dry snacks etc.

Posted on

Finishing the Flying Acorn

My last flying acorn post ended when the easiest stitching tasks had been completed and I was getting ready to tackle the tricky curves of the oak leaves. Not the most riveting cliffhanger (embroidery is yet to establish itself as an extreme sport), but I definitely faffed a bit getting to grips with it. It always takes a bit of extra effort to get started on something when you know the end result will be imperfect. But the challenge of it is the spur that keeps the project going.


(If you’re coming in cold to this second half of the project and the context seems to be missing, here’s the first part: https://staging.thebritishcrafthouse.co.uk/flying-acorns/)


Applique acorn with two grey and green oak leaves.


My hand appliqué techniques could do with some finessing. Most of the time I coaxed the fabric into turning underneath. I pinned and tacked everything mercilessly so that it would hold in place until I could stitch it more subtly. There was the expected amount of fraying and fiddliness, but I more or less wrestled the leaves into submission.


It would have taken me a lot more time to get a neater result, although that’s something worth trying when I have the time to do and redo. In the spirit of done is better than perfect, I was quite happy with my efforts. And I covered up some of the issues with more couching…


Once the leaves were stitched, it was time think about decoration. I’d been waiting for this point to see what ideas occurred to me. Lou’s blog mentions beads and metallic threads so I’d been turning over some thoughts in that direction.


I spent a bit of time doodling designs on a bunch of oak leaf outlines, to see what suited the shapes. Curves and swoops seemed the way to go. It was an easy decision to use one of my favourite doodle patterns for the right hand leaf. A delicate scroll design, backstitched in a silvery thread, gave a pretty suggestion of filigree. Another time I would have whipped the backstitch to create a smoother line, but time didn’t allow. I’ll need to create some more projects that allow me to play around with that sort of design as I find it so pleasingly pretty.


For the left hand leaf I got out a stash of fabric scraps and cut out some paisley swirls to highlight the curves of the oak leaf. I tacked them down and secured them with embroidered outlines, plundering my Embroidery Stitch Bible (link below) for stitch inspiration.


Close up of oak leaf with paisley applique shapes. Each paisley shape outlined in a different embroidery stitch: Pekinese, heavy chain, feather, herringbone, fern and French knots.


This style of textile art is new to me. I wanted decorations that had some variety and allowed for creative play, but which were simple enough to be stitched quite quickly. I like my golden highlight on the acorn – a teeny bit of bling and easy to stitch.


The final step was to add some beads, to chime with Lou Gardiner’s flair for mixed media creations. It was easy to decide on a random-ish scatter of silver beads among the scrolling threads. The left hand leaf had me thinking a bit more – I was tempted to create something a little more elaborate. But I didn’t want the beading to outweigh the rest of the decoration, so I went with my scatter plan for both leaves.


I am pleased with the final result. It’s always satisfying to complete a project in any case, and this one felt like a bit of an unknown quantity until everything was stitched in place. This piece had such obvious stages – from felt padding to appliqué, followed by embroidery and beading. I wanted each stage to enhance the project and not spoil the work that had already been done. I still have plenty to learn and refine in terms of hand appliqué, textile design and mixed media embellishments, but I like this piece as an introduction to those techniques.


As per the brief, I have also composed a hand written letter, ready to send to the Acorn Team at Marchmont House with the hoop. It will be on its way shortly. Keep an eye on my Instagram account – or, more importantly, Lou Gardiner’s – and I will give a shout out when the exhibition appears.


Thanks for reading, I hope you enjoyed following my progress. My next blog will be about the next stage in my stitchy plans. I have a list of projects as long as several arms, which I’m hoping will develop and refine my embroidery skills over time.


If you would like to see the video journal I have created for my embroidery projects, the YouTube link is also below:

Sweet Thorn’s embroidery chats on YouTube: https://www.youtube.com/watch?v=h2WHepz224A&list=PL5GoJm8wxHjSfwVkBbOvzUC8IbWjirYGp


Lou Gardiner:https://www.instagram.com/lou_gardiner_embroidery/

Sweet Thorn: https://www.instagram.com/sweetthorn.embroidery/


The Embroidery Stitch Bible (Betty Barnden): https://royal-needlework.org.uk/product/the-embroidery-stitch-bible/

Posted on — Leave a comment

Saying hello!

boho feather

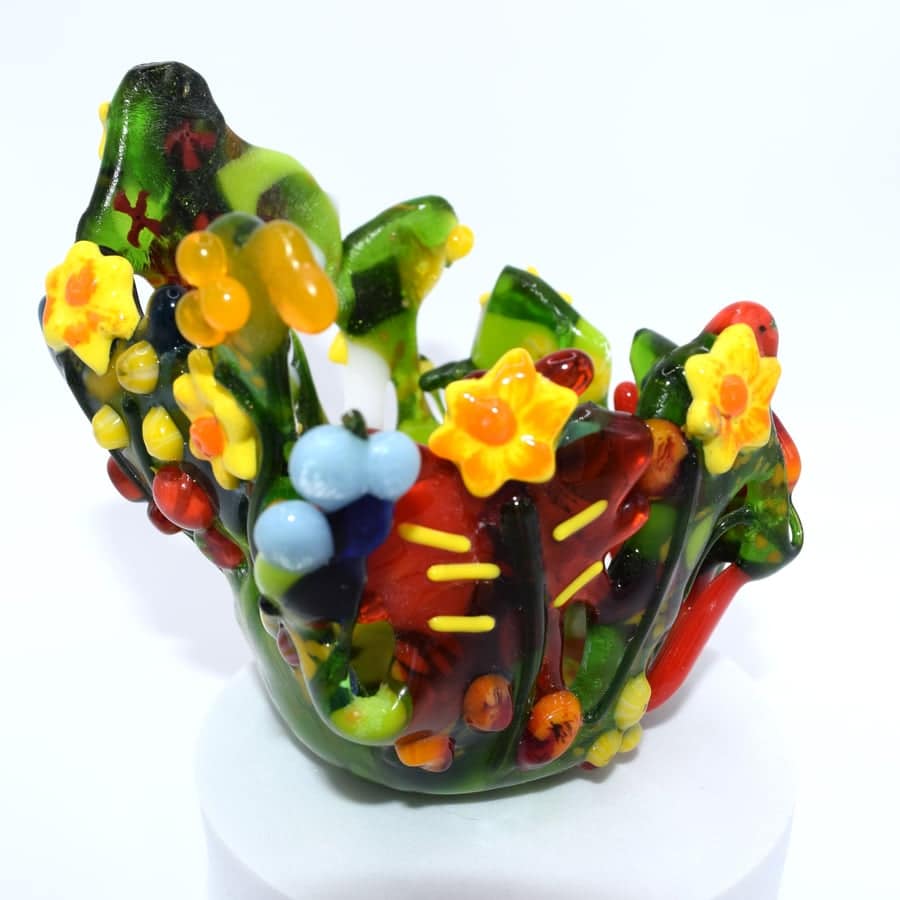
Hello and welcome to my first blog post! A little bit about me- I am an experimental glass artist from Blackpool. I live with my husband, John, and our little black pug, William.

I love experimenting with glass, my favourite thing to do is just play and see what happens! I love colour and am really drawn to making bright and cheerful things. 

This is one of my favourite experimental glass pieces. It is inspired by spring flowers and features flowers that were made with the freeze and fuse technique. I hope to make a similar one to list on my shop in the next few weeks! I will keep you posted. 

I am currently waiting for a kidney transplant and go to dialysis 3 times a week, I like to pass the time planning new projects and working on my shop while I have my treatment. I  have lots of creative plans for the future!   

Posted on

What’s in a name?

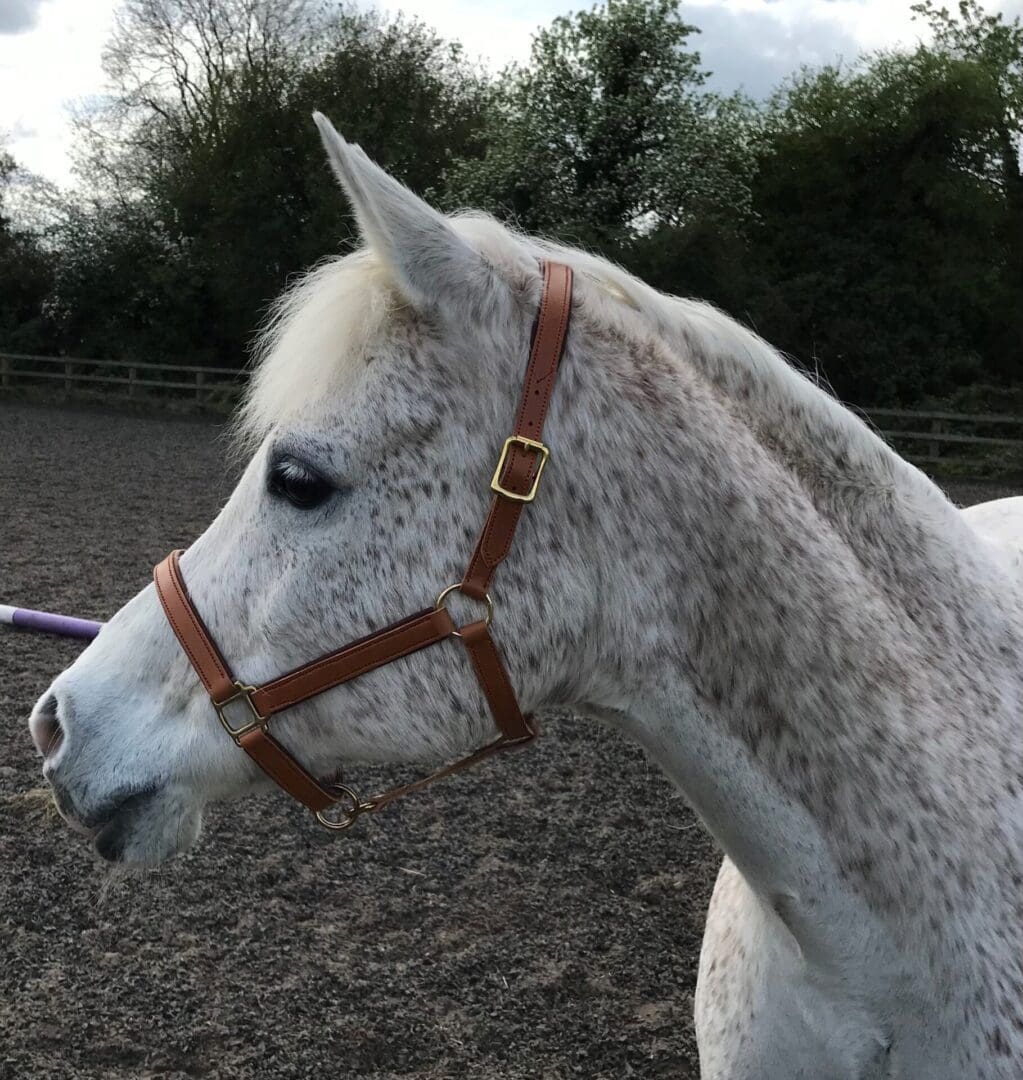
Annie handmade leather head collar

I thought I’d tell you a bit about my brand name. Sulana Leathercraft is named after my gorgeous Arab mare Annie aka Sulan Anastasia (her Sunday name!).

Annie is the reason I started my leatherwork journey as I was unable to find a bridle that fitted her in a colour I liked so I decided to learn to make one myself – as you do!

Little did I know this would spark a passion (and addiction!) in me to work with leather. I started by practising my skills and making gifts for friends and family. The feedback was good so I decided to take the plunge and make more diverse items. I love finding a new pattern or a leather I haven’t worked with before and trying out how it works, how it handles and what the finished product looks like. It doesn’t always turn out well but hey, that’s how we learn right?

I am pleased to say that over the last 18 months my skills have gone up and my injury rate has gone down so something must be working!

I love when a potential customer asks if I can make something bespoke for them as this starts a fantastic collaborative journey where I can help them bring their ideas to life!

Needless to say – Annie has more bridles than she can possible need now!!

Posted on

Lets talk leather care!

Leather is a naturally hardwearing product and can last for years if well cared for. Leather can dry out (just like our skin does) if exposed to extreme temperatures, water, or too much sunlight. 

Most vegetable or oak bark tanned leather will have enough oils to sustain it for the first 6 months. After that, your leather item will need to be cared for regularly using a natural leather balm to replenish these oils and keep it supple, help it patina, and add a degree of water resistance.

I use English and Italian vegetable and oak bark tanned leathers which are hardwearing, supple and will build a lovely patina over time. They are supple right from the start, smell amazing and show the natural character of the hide. Each piece is unique with the growth marks and subtle hues varying from hide to hide. The oak bark and vegetable tanning methods do not use chemicals so these leathers are kinder to the environment.

All my leather goods come with a leather care leaflet which includes my personal recommendations for leather balms. (Other care products are available!). Surface scratches can be improved using a matching coloured leather balm and buffed in. Please contact me if in doubt! I’m always happy to help.

A soft horse hair brush can be very useful for removing dust and for buffing in that balm! A regular wipe over with a soft dry cloth can help remove surface dust and dirt. This is best done weekly.

Leather can stretch over time so avoid over filling your handbag or wallet!

Store your handbag in the cotton dust cover I send with it to protect it from scratches, etc. Do not wrap leather items in plastic as it will need to breathe, and avoid storing next to radiators as this will dry out the leather.

Most of all, enjoy your new leather item for years to come!!

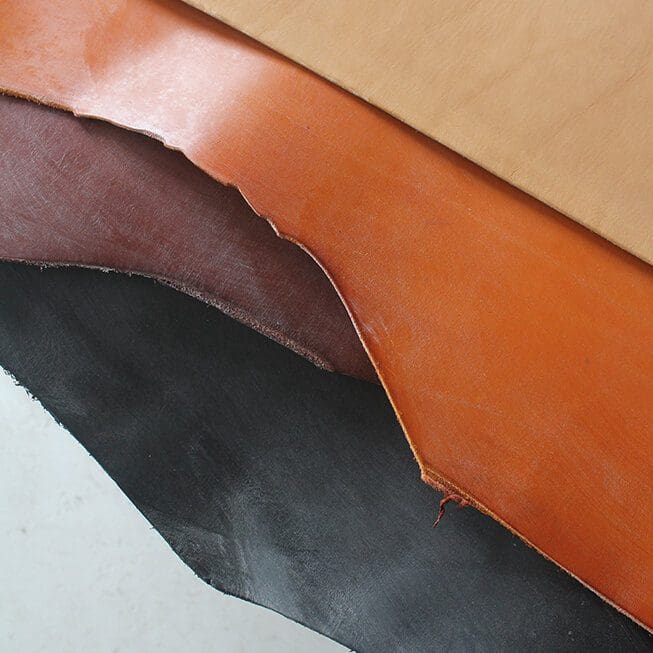
Image from J&FJ Baker & Co Ltd featuring their fantastic oak bark tanned leathers! One of my favourite leathers to work with and featured in my upcoming new Core Collection! Watch out for a future blog all about why their leather is so special!!

Posted on — Leave a comment

Flying Acorns

Nearly a year into this blog and I have some embroidery content to talk about. If necessary, now is the time to pick yourself up off the floor…


But I always wanted embroidery chat to evolve naturally in this blog. I didn’t particularly want to replicate my social media posts and newsletters, where I talk about work in progress and the finished results. I have taken this blog off at a tangent and talked a lot about connecting with sights and sounds in nature, much of which inspires my embroidery work. 


Now I have some embroidery projects developing which are largely separate from what I’m selling in my online shops. They are slow projects, and I’m using them to learn more about embroidery techniques and designs. All being well, I will have a lot to talk about here.


Today’s post is about a collaborative project that I’ve joined: Lou Gardiner’s Flying Acorn Army, an exhibition inspired by and hosted at Marchmont House in the Scottish Borders. Hundreds of people have already submitted embroidered acorns to accompany Lou’s very fabulous Cape of Creative Courage.


You can read about how this project started on Lou’s blog and follow its progress on herInstagram account:

https://www.lougardiner.co.uk/blog.php 

https://www.instagram.com/lou_gardiner_embroidery/


When this project was initially announced last year, I didn’t have enough spare time to work on an acorn piece. But the deadline has been extended to the end of August and I’ve had more time over the summer to get stuck into my own interpretation of Lou’s design.


This first stage was put together according to the guidance on Lou’s blog. A sheer fabric mounted in a hoop, with the inner hoop bound to keep the muslin in place.


Felt acorn with two green felt oak leaves.


Lou provided templates for the acorns and instructions on how to build up layers of felt padding to provide a foundation for stumpwork.


Applique acorn with two  green oak leaves.


I chose a variety of fabrics to layer over the felt. As you can see, on the left I opted for a top layer of felt too. Whipstitching the padding to the hoop turned out to be pleasingly neat, and felt is so forgiving and doesn’t fray. So I chose to use an extra layer and kept that section tidy at least.


Applique acorn with two  green oak leaves.


I began with the least challenging fabrics, on the whole. I am not practised at hand applique, so I started with fabrics that I could stitch straight onto the muslin, without turning the edge of the fabric. The felt was easy to whipstitch. I then used a buttonhole stitch to secure the acorn cup, to prevent the tweed (oh gorgeous barleycorn!) from fraying. Similarly, I couched the edge of the second leaf – laying down 6 strands of silvery-grey DMC floss and securing it with 4 strands of one of my favourite green shades (which is 3051 in case you’re interested).


I chose an easy target for the first attempt at applique and tried out hidden whipstitch for the cotton part of the acorn. The curve was indeed tricky. I am pleased with how it turned out but it gave me a lot to think about in terms of capturing wiggly oak leaves. 


I’ll be back in August to show you how the rest of the applique went, and hopefully to show you the finished piece all decorated and ready to send. Thanks for reading!

Posted on

Summertime Blues

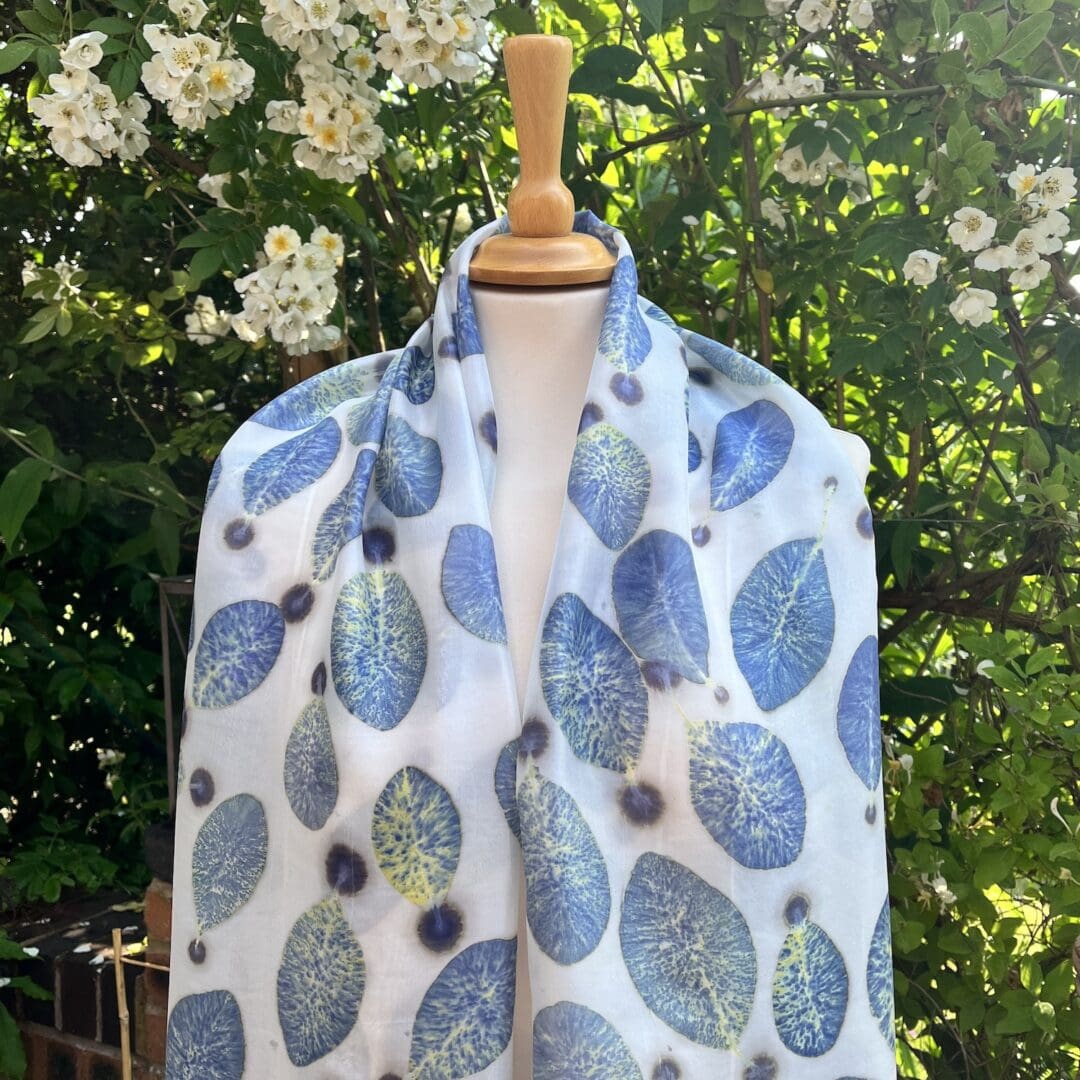
Cotinus Eco Printed Silk Scarf

[vc_row][vc_column][vc_single_image image=”743825″ img_size=”full”][vc_custom_heading text=”Summertime Blues” font_container=”tag:h1|font_size:64|text_align:left” use_theme_fonts=”yes”][vc_column_text]I am lucky to live in a wonderfully friendly and generous neighbourhood where we all look out for each other, return favours and pay small kindnesses forward. Often it is our gardens that bring us together, sharing advice, splitting plants to give to each other, passing on surplus crops and of course, sitting down for coffee together to enjoy the beauty of our horticultural efforts. It is wonderful to have shared interests.

I have always had a love of plants so to be able to marry gardening with my creative textile practice, embracing natural dyeing and eco printing, has opened up a whole new world!

My latest prints are all from the leaves of the Cotinus. [/vc_column_text][/vc_column][/vc_row][vc_row gap=”10″ equal_height=”yes” content_placement=”top” el_class=”custnews”][vc_column width=”1/2″][vc_single_image image=”743826″ img_size=”full”][vc_column_text el_class=”custnewstool”]

Smoke Bush for Eco Printing Blues

[/vc_column_text][vc_column_text]Often called, Smoke Bush, the Cotinus is currently in full flower here in the UK. The plant produces dark, reddish-purple leaves with tiny, frothy flowers, on long stems, like billowing clouds of smoke, all over the top, hence it’s name[/vc_column_text][/vc_column][vc_column width=”1/2″][vc_single_image image=”743827″ img_size=”full”][vc_column_text el_class=”custnewstool”]

Cotinus Royal Purple

[/vc_column_text][vc_column_text]It is now that these dramatically dark leaves are perfect for eco printing, surrendering their pigments to produce the most incredible range of colours! It is one of the most exciting leaves I have found to work with, as very few others will produce such a wealth of blue hues.[/vc_column_text][/vc_column][/vc_row][vc_row gap=”10″ equal_height=”yes” content_placement=”top” el_class=”custnews”][vc_column width=”1/3″][vc_single_image image=”743826″ img_size=”full”][vc_column_text el_class=”custnewstool”]

Eco Printed Silk Scarf with Cotinus Blue Leaf Design

[/vc_column_text][/vc_column][vc_column width=”2/3″][vc_column_text]

In my experience, the leaves print from yellow, through shades of blue and into strong mauves whilst their pigment is at its strongest. But as it’s all down to nature, you should be aware that the same plant may well produce leaves with very different levels of pigment in, dependent upon the location, the time of year, the weather and even the day of the week! To me, that is the excitement of this creative practice and whilst there is a definite science behind eco printing, I am much more of an artist than a scientist!

[/vc_column_text][/vc_column][/vc_row][vc_row gap=”10″ equal_height=”yes” content_placement=”top” el_class=”custnews”][vc_column width=”1/3″][vc_single_image image=”743827″ img_size=”full”][vc_column_text el_class=”custnewstool”]

Eco Printing in my Garden Room Studio

[/vc_column_text][vc_single_image image=”743829″ img_size=”full”][vc_column_text el_class=”custnewstool”]

Removing the Iron Blanket

[/vc_column_text][vc_column_text]I sometimes prefer the blanket prints to the scarves, but nothing could compare to this silk beauty! [/vc_column_text][/vc_column][vc_column width=”2/3″][vc_column_text]

have been working with Cotinus Coggygria ‘Royal Purple’, a deciduous shrub, which happens to grow in full sun at the end of my neighbour’s drive. I am indebted to her, for her generosity and I can often be found sustainably harvesting new plant material from her beautiful garden! The maturity of this particular bush means I can collect large leaves to print with, and I suspect this maturity has also had an impact on the quality of the pigments contained within the leaves.

In this instance, I have been working simply, without dyes, printing the Cotinus leaves onto a natural silk background. The colours have been astounding! A simple mordant ensures that the pigments will remain within the silk and an iron blanket encourages a crisper result.

A mordant is a naturally occurring metal salt and is necessary to fix colour pigments, tannins or dyes. It bonds to the fibres in the fabric and enables the pigments to fix strongly to the mordant. In this case, the mordant I have used is Potassium Aluminium Sulphate. PAS sounds a little bit scary, but is widely available and perfectly safe to use, you will find it is used in the process of pickling foods and in fact is found in baking powder too.

You can seek to influence the colour of the prints very slightly by using different mordants with your target fabric. If required, once printed, the colours can sometimes be softened, saddened or brightened by post mordanting. This, however, is not a technique I use often in my practice and these colours certainly didn’t require an extra lift!

For the purposes of this particular silk scarf, the leaves were all placed underside down, often referred to as moon side down. The leaves release more of their pigments and tannins from their softer underside.

Interestingly, the top of the leaf or the sun side, will also produce a print, in this case, onto the surface of the iron blanket.

[/vc_column_text][/vc_column][/vc_row][vc_row gap=”10″ equal_height=”yes” content_placement=”top” el_class=”custnews”][vc_column width=”1/3″][vc_single_image image=”743830″ img_size=”full”][vc_column_text el_class=”custnewstool”]

Botanical Printed Silk Scarf with Smoke Bush

[/vc_column_text][/vc_column][vc_column width=”2/3″][vc_column_text]If you would like to own an entirely unique eco printed silk scarf for yourself, you will find all of my artisan creations in my online gallery at the British Craft House and I will be printing more of this extraordinary plant in the coming weeks.Rather unusually for me, I have one of these particularly beautiful silk scarves hanging in my own wardrobe just now. I am so looking forward to wearing it as it is very rare that I keep any of the pieces that I create.

As for my lovely neighbour? She too can be seen out and about in a very pretty, silk chiffon scarf, botanically printed with the Cotinus leaves from her very own garden!

Please let me know if you have enjoyed this little insight into my creative lifestyle and do look out for more of my ramblings in the future!

Louise x[/vc_column_text][/vc_column][/vc_row]

Posted on

Modern hexagon patchwork quilts

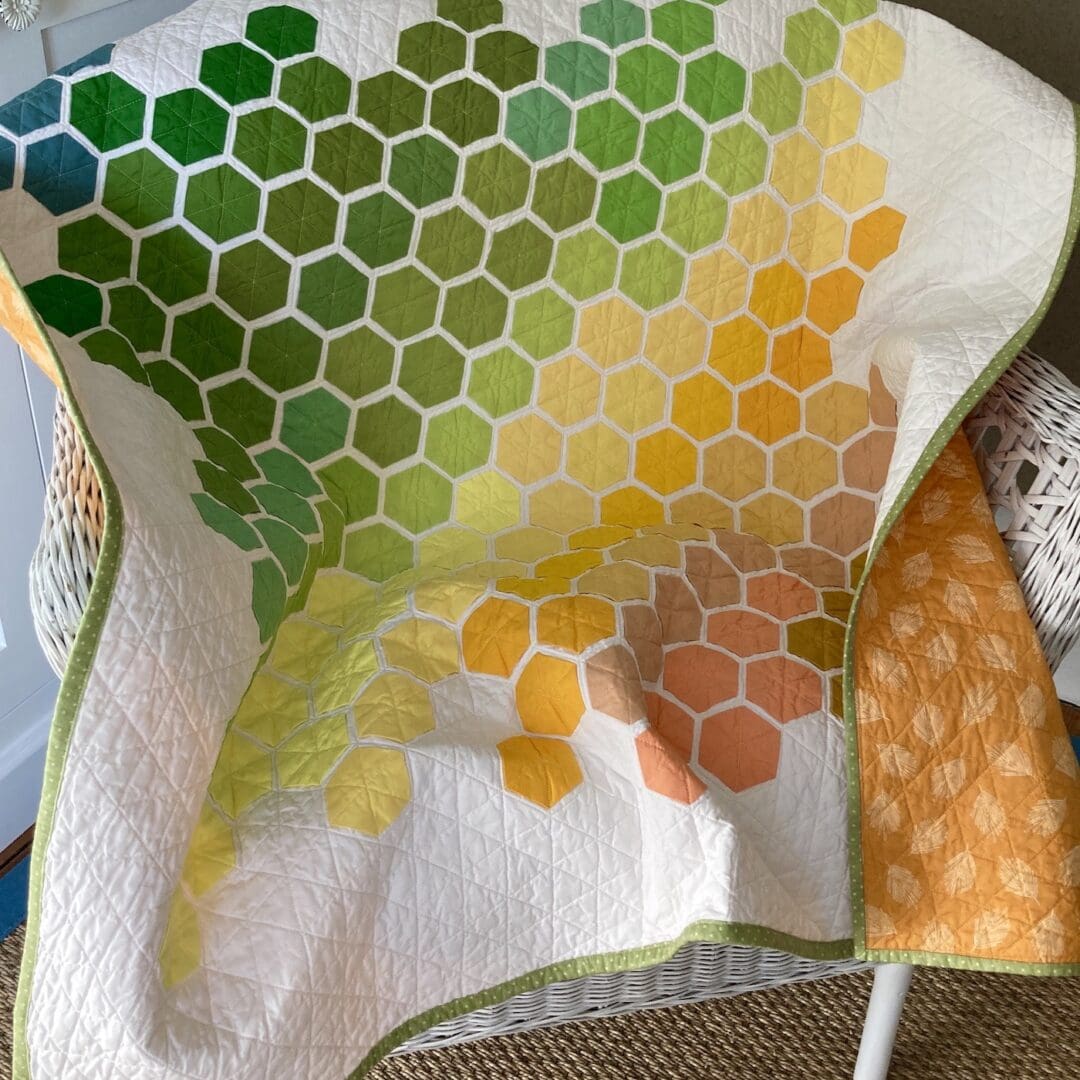
Modern baby hexagon quilt in autumn colours

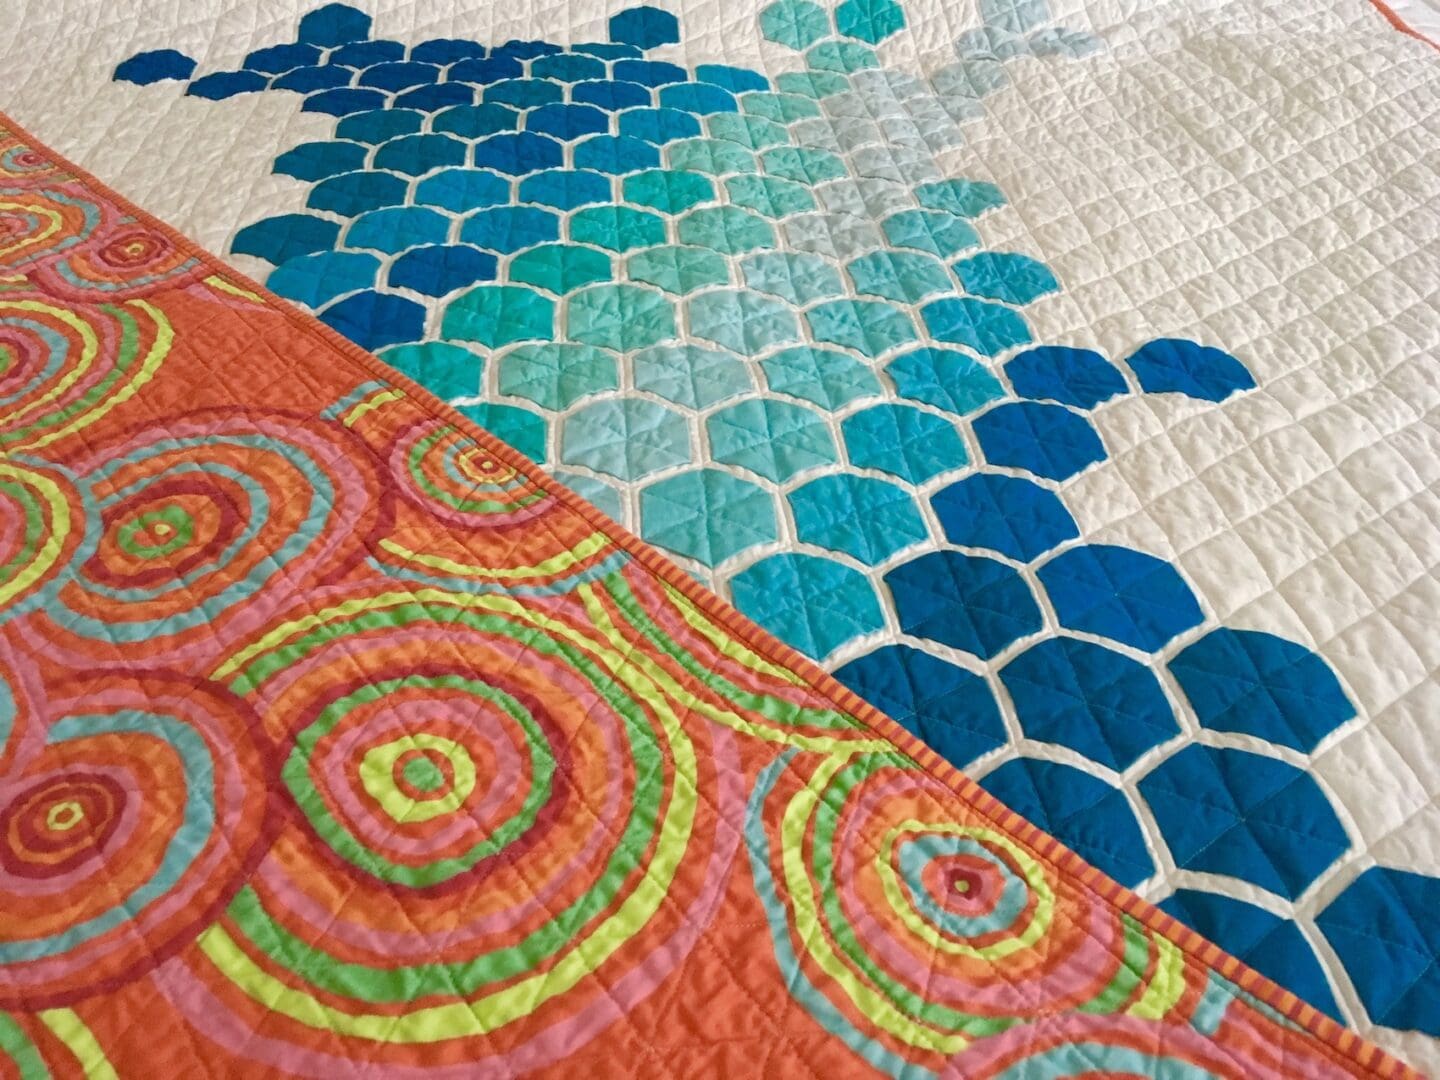
Hi, I’m Jane and I’ve been making quilts for over twenty years.  A few years ago I made a traditional hexagon quilt, and wondered if there was a way to make it more modern.  I started playing with laying out and sewing hexagons onto a background.

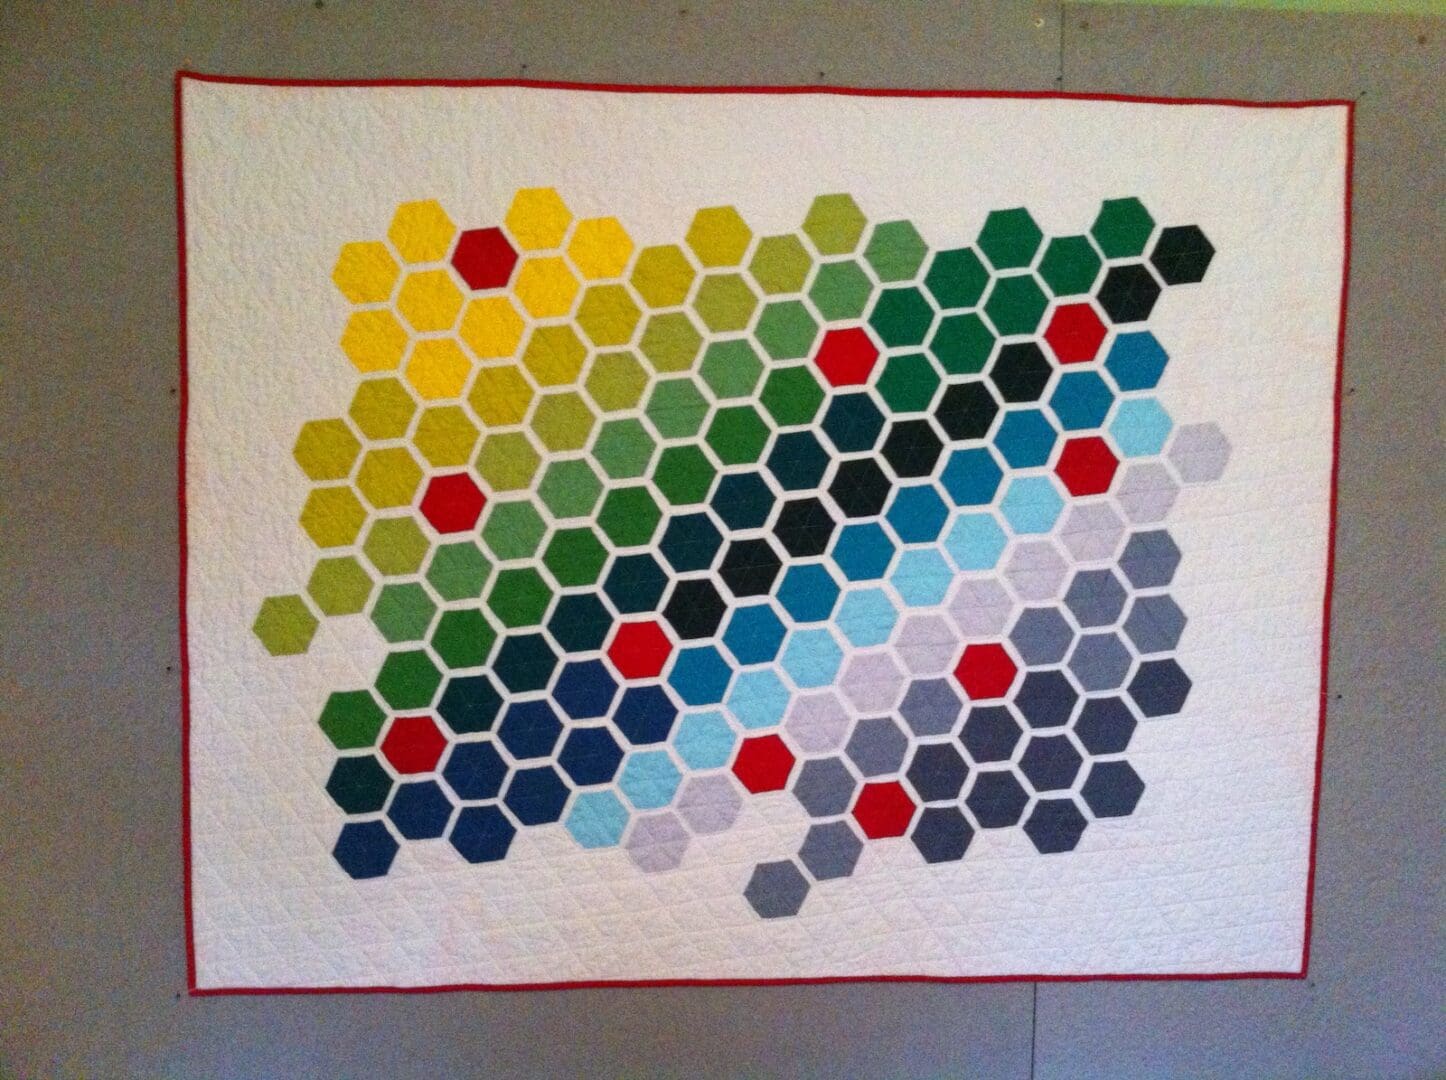
Baby modern hexagon quilt

I love the way I can create an ombre effect with varying shades of plain fabrics, and can change the look by inserting a few hexagons that ‘pop’ within a quilt.

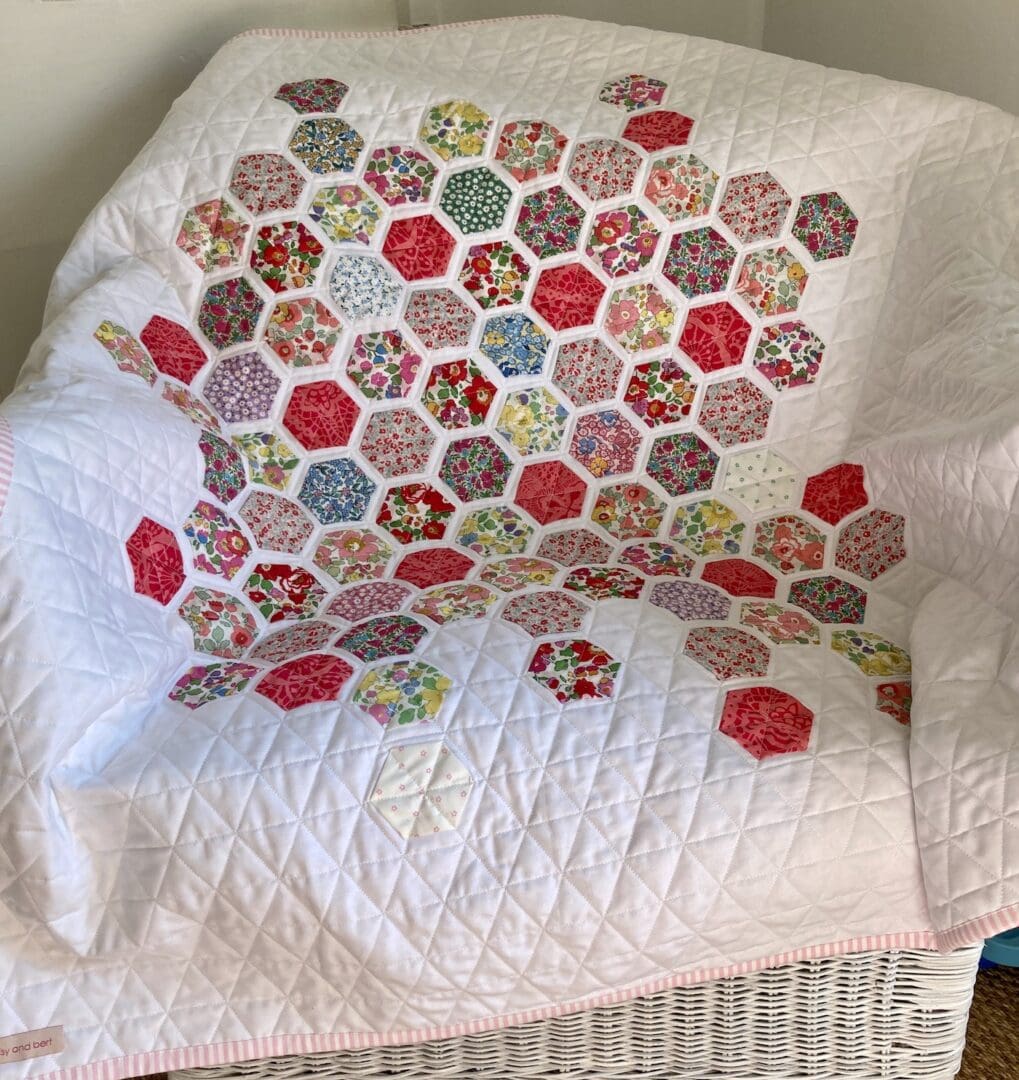
Modern hexagon livery fabric baby quilt

I’ve also made some quilts with delicate and bright Liberty fabrics, that are just so pretty.  It’s great to be able to customise a quilt depending on what theme or effect is requested.  I can size up and down, so have made every size from cot to double bed.

Thanks for reading. I hope you like the quilts as much as I do.