Posted on

Finishing the Flying Acorn

My last flying acorn post ended when the easiest stitching tasks had been completed and I was getting ready to tackle the tricky curves of the oak leaves. Not the most riveting cliffhanger (embroidery is yet to establish itself as an extreme sport), but I definitely faffed a bit getting to grips with it. It always takes a bit of extra effort to get started on something when you know the end result will be imperfect. But the challenge of it is the spur that keeps the project going.


(If you’re coming in cold to this second half of the project and the context seems to be missing, here’s the first part: https://staging.thebritishcrafthouse.co.uk/flying-acorns/)


Applique acorn with two grey and green oak leaves.


My hand appliqué techniques could do with some finessing. Most of the time I coaxed the fabric into turning underneath. I pinned and tacked everything mercilessly so that it would hold in place until I could stitch it more subtly. There was the expected amount of fraying and fiddliness, but I more or less wrestled the leaves into submission.


It would have taken me a lot more time to get a neater result, although that’s something worth trying when I have the time to do and redo. In the spirit of done is better than perfect, I was quite happy with my efforts. And I covered up some of the issues with more couching…


Once the leaves were stitched, it was time think about decoration. I’d been waiting for this point to see what ideas occurred to me. Lou’s blog mentions beads and metallic threads so I’d been turning over some thoughts in that direction.


I spent a bit of time doodling designs on a bunch of oak leaf outlines, to see what suited the shapes. Curves and swoops seemed the way to go. It was an easy decision to use one of my favourite doodle patterns for the right hand leaf. A delicate scroll design, backstitched in a silvery thread, gave a pretty suggestion of filigree. Another time I would have whipped the backstitch to create a smoother line, but time didn’t allow. I’ll need to create some more projects that allow me to play around with that sort of design as I find it so pleasingly pretty.


For the left hand leaf I got out a stash of fabric scraps and cut out some paisley swirls to highlight the curves of the oak leaf. I tacked them down and secured them with embroidered outlines, plundering my Embroidery Stitch Bible (link below) for stitch inspiration.


Close up of oak leaf with paisley applique shapes. Each paisley shape outlined in a different embroidery stitch: Pekinese, heavy chain, feather, herringbone, fern and French knots.


This style of textile art is new to me. I wanted decorations that had some variety and allowed for creative play, but which were simple enough to be stitched quite quickly. I like my golden highlight on the acorn – a teeny bit of bling and easy to stitch.


The final step was to add some beads, to chime with Lou Gardiner’s flair for mixed media creations. It was easy to decide on a random-ish scatter of silver beads among the scrolling threads. The left hand leaf had me thinking a bit more – I was tempted to create something a little more elaborate. But I didn’t want the beading to outweigh the rest of the decoration, so I went with my scatter plan for both leaves.


I am pleased with the final result. It’s always satisfying to complete a project in any case, and this one felt like a bit of an unknown quantity until everything was stitched in place. This piece had such obvious stages – from felt padding to appliqué, followed by embroidery and beading. I wanted each stage to enhance the project and not spoil the work that had already been done. I still have plenty to learn and refine in terms of hand appliqué, textile design and mixed media embellishments, but I like this piece as an introduction to those techniques.


As per the brief, I have also composed a hand written letter, ready to send to the Acorn Team at Marchmont House with the hoop. It will be on its way shortly. Keep an eye on my Instagram account – or, more importantly, Lou Gardiner’s – and I will give a shout out when the exhibition appears.


Thanks for reading, I hope you enjoyed following my progress. My next blog will be about the next stage in my stitchy plans. I have a list of projects as long as several arms, which I’m hoping will develop and refine my embroidery skills over time.


If you would like to see the video journal I have created for my embroidery projects, the YouTube link is also below:

Sweet Thorn’s embroidery chats on YouTube: https://www.youtube.com/watch?v=h2WHepz224A&list=PL5GoJm8wxHjSfwVkBbOvzUC8IbWjirYGp


Lou Gardiner:https://www.instagram.com/lou_gardiner_embroidery/

Sweet Thorn: https://www.instagram.com/sweetthorn.embroidery/


The Embroidery Stitch Bible (Betty Barnden): https://royal-needlework.org.uk/product/the-embroidery-stitch-bible/

Posted on — Leave a comment

Flying Acorns

Nearly a year into this blog and I have some embroidery content to talk about. If necessary, now is the time to pick yourself up off the floor…


But I always wanted embroidery chat to evolve naturally in this blog. I didn’t particularly want to replicate my social media posts and newsletters, where I talk about work in progress and the finished results. I have taken this blog off at a tangent and talked a lot about connecting with sights and sounds in nature, much of which inspires my embroidery work. 


Now I have some embroidery projects developing which are largely separate from what I’m selling in my online shops. They are slow projects, and I’m using them to learn more about embroidery techniques and designs. All being well, I will have a lot to talk about here.


Today’s post is about a collaborative project that I’ve joined: Lou Gardiner’s Flying Acorn Army, an exhibition inspired by and hosted at Marchmont House in the Scottish Borders. Hundreds of people have already submitted embroidered acorns to accompany Lou’s very fabulous Cape of Creative Courage.


You can read about how this project started on Lou’s blog and follow its progress on herInstagram account:

https://www.lougardiner.co.uk/blog.php 

https://www.instagram.com/lou_gardiner_embroidery/


When this project was initially announced last year, I didn’t have enough spare time to work on an acorn piece. But the deadline has been extended to the end of August and I’ve had more time over the summer to get stuck into my own interpretation of Lou’s design.


This first stage was put together according to the guidance on Lou’s blog. A sheer fabric mounted in a hoop, with the inner hoop bound to keep the muslin in place.


Felt acorn with two green felt oak leaves.


Lou provided templates for the acorns and instructions on how to build up layers of felt padding to provide a foundation for stumpwork.


Applique acorn with two  green oak leaves.


I chose a variety of fabrics to layer over the felt. As you can see, on the left I opted for a top layer of felt too. Whipstitching the padding to the hoop turned out to be pleasingly neat, and felt is so forgiving and doesn’t fray. So I chose to use an extra layer and kept that section tidy at least.


Applique acorn with two  green oak leaves.


I began with the least challenging fabrics, on the whole. I am not practised at hand applique, so I started with fabrics that I could stitch straight onto the muslin, without turning the edge of the fabric. The felt was easy to whipstitch. I then used a buttonhole stitch to secure the acorn cup, to prevent the tweed (oh gorgeous barleycorn!) from fraying. Similarly, I couched the edge of the second leaf – laying down 6 strands of silvery-grey DMC floss and securing it with 4 strands of one of my favourite green shades (which is 3051 in case you’re interested).


I chose an easy target for the first attempt at applique and tried out hidden whipstitch for the cotton part of the acorn. The curve was indeed tricky. I am pleased with how it turned out but it gave me a lot to think about in terms of capturing wiggly oak leaves. 


I’ll be back in August to show you how the rest of the applique went, and hopefully to show you the finished piece all decorated and ready to send. Thanks for reading!

Posted on — Leave a comment

Taking Notes

Hi, I’m Rachel from Sweet Thorn. My plan with this blog – which I think I will call Taking Notes – is to continue developing a habit of noticing details in nature.

Some years ago, when I was thinking over ideas about embroidery and what I found inspiring, I realised I had lost the time to notice details we see every day. Nettles and dandelions, or the flowers we see in
hedgerows and brownfield sites, get taken for granted. But, given the time, I like looking more closely at plants and flowers, to see the detail of petals and leaves and notice distinctions. I also like to know what I’m looking at. I realised how easy it was to glance at a hedgerow and label the lacy flowers as umbellifers, without knowing which ones were cow parsley and which were Queen Anne’s Lace. Or hemlock for that matter.

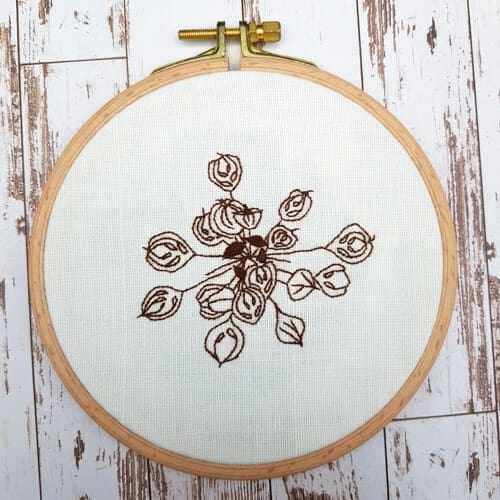
Embroidered cow parsley seed heads

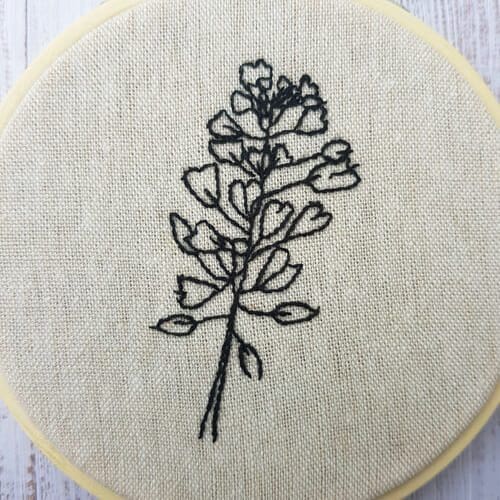
My embroidery art is influenced by these small details, many of which I have learned only in the last few years, through taking photos and looking up what I’ve seen. There are a lot more white and lacy umbellifers than I knew, and their flowers are so varied! The seed heads can be just as intriguing – cow parsley seed heads have exquisite little curling details like filigree. Other plants are a bit more familiar – I particularly enjoyed stitching the distinctive heart-shaped seeds pods which make shepherd’s purse so easy to identify.

Close up of shepherd's purse seed heads, outlined in embroidery.

Hand stitching is an excellent way to highlight details and draw the eye but of course it develops much more slowly. I choose my subjects carefully – I want to be able to recreate my sketches in thread and communicate
what I find most captivating. But even simple designs take time. The advantage of this is that hand embroidery creates a lovely, careful rhythm of work. But writing will add to the scope of embroidery, as I can describe a wider variety of plants more easily. I can also communicate more than the appearance of different wildflowers – I can talk about the fragrance of honeysuckle, juicy blackberries and the feel of leaves in different seasons. I am hoping that taking the time to reflect will allow me to notice more details each time I go out, and that the busyness of life can be balanced against things like noticing the shape of hawthorn leaves or the gleam of rowan berries.

I’ll be back next month – thanks for reading! All best,
Rachel