Posted on — Leave a comment

Meet the Sellers x 3!


Team TBCH South East Cornwall Meetup – meet Halyey, Buffy & Chris


Written by Buffy…who is The Twisted Felter

So earlier today I met up for brunch with the lovely Hayley aka The Northern Smuggler and Chris The Chris Artist. Chris paints beautiful artwork from the surrounding areas and Hayley creates fabulous Resin artwork and jewellery inspired by the local Cornish Coast. Luckily Chris had chosen the best café (award winning @olivecocafe thankyou…delish!) and so I turned up to meet 2 complete strangers thinking I should have worn a rose in my lapel?! Sadly I was lapel-less so I took a chance and sidled up to a random man sitting on his own who fortunately turned out to be Chris and Hayley joined us soon after.

My brain is a busy one so I had brought along a list of things I wanted to ask (I feel like a bit of a duffer with the whole online selling and social media stuff as I’m new to the game) and was pleasantly surprised that they too had the same questions and doubts. As Hayley put it ‘Fake it ’til you Make it’. Although Hayley was not giving herself credit as she had lots of  great media tips and advice and has her own professional branding which looks fab. Chris is already self employed so gave me good advice around tax returns, a boring but necessary part of it all. It was sound advice…pay an accountant!!

We chatted about The British Craft House website and how we were finding navigating our way around. We wondered when Dottie (our Illustrious Leader, advice giver, encouragement officer and all round good egg) EVER SLEEPS?!? She seems to be sending encouraging posts in the middle of the night!

We talked about how isolating working alone and from home can be sometimes and how fab it was to meet up with the real people behind our sellers names. We shared contacts for work in the local area, craft initiatives,the best Apps, training days, ideas for display and presentation, photography and we laughed at ourselves a fair bit. We talked about the insecurities of seeing the imperfections in our work and whether they are good enough to sell, the vulnerability of putting your work out there in front of people, the difficulty of feeling comfortable promoting (non-stop!) yourself online. And we arranged to meet again of course.

So this is my first blog. I’ve no idea whether it’s good. Or not. But I’m venturing right out of my comfort zone writing it AND putting a photo of myself online. That’s how rock and roll I am today. I’m a blogger. Boom!
Posted on — Leave a comment

Silver Jewellery Descriptions

Silver and sterling silver are terms that are often used interchangeably, but they do not always mean the same thing. A product may be described as silver when in fact it is just silver-coloured.

I think this can be confusing for many people so thought I would publish a quick guide to some of the main types of ‘silver’ I frequently see marketed.

Fine Silver – .999

Fine silver, has actual silver content of 99.9%. Because of its high purity, fine silver is considered too soft to use in a lot of jewellery making applications and is often mixed with other metals to make it harder.

Items made of fine silver may wear faster than sterling pieces as a result of its inherent softness.

Sterling Silver -.925

Sterling silver is an alloy (92.5% silver) created when another metal, commonly copper, is added to pure silver in order to make the resulting compound more durable and less soft for a wide range of jewellery uses.

Sterling silver will generally be marked as such with a 925 stamped in it. In the UK if an item weighs more than 7.78g and is to be sold as Sterling, it must be assayed (tested) and hallmarked as such by one of the official assay offices.

Sterling Silver may tarnish but can be cleaned with a special cloth designed to remove the tarnish.

Silver Plated

Silver plating is a very thin layer of silver deposited on to a base metal such as copper, brass, or nickel. Most fashion jewellery is silver plated. Unless it is specifically marked otherwise you should assume that your piece is plated. If you wear the jewellery frequently, expose it to body lotions and perfumes or wear it in water, the plating will eventually rub off.

Silver Filled

Silver filled is similar to silver plated but a much thicker layer of silver is applied to the base metal at its core. The result is a much more durable piece.

Silver Tone

An item described as silver-tone may not have any silver at all in it. It may simply be silver in colour.

Posted on — Leave a comment

Traditional V Digital Sculpture techniques?

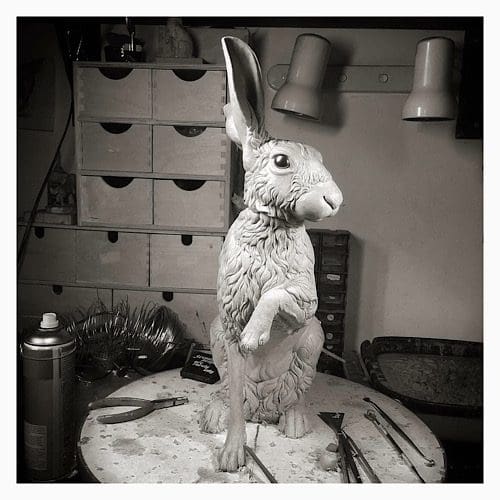
I’ve been a traditional sculptor for more than 30 years. I enjoy the relationship I have with the medium I use, and also the close interaction with the reference materials I choose, both of which combine to help me create the sculptures I produce.

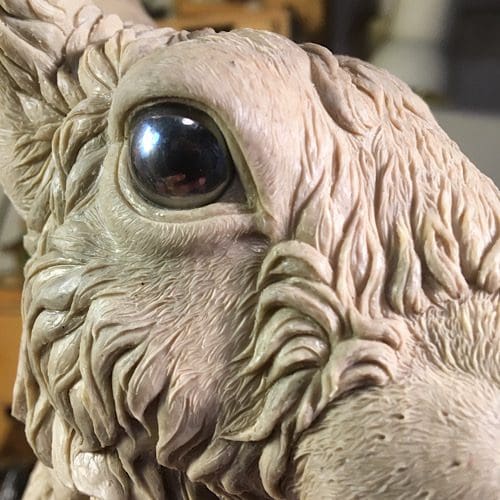
Close up of a Hare sculpture created using traditional sculpting techniques
Close up of my Harriet Hare sculpture created using traditional sculpting techniques

I am rather resistant to change, and have tended to view ‘digital’ sculpting as… cheating! Well, to some degree any way! However, a figurine designing company recently contacted me after they began following me on Instagram and they commented that they were impressed by my ‘sensational fur sculpting skills’! (?) They went on to ask me to sculpt a type of Tiger for them, even though they employ several digital sculptors. It seems that perhaps fur can’t easily be replicated using a computer and that the hand and eye of a traditional sculptor might still be useful in this digital age! 

I was thinking about how I was going to approach this project and I had an idea about how to incorporate working ‘with’ digital sculptors which would save the company time and money and still produce the finish on the sculpture which they came to me for.

I admit to feeling slightly apprehensive when I emailed them my idea… I know nothing about digital sculpting or 3D printing and was expecting my idea to be shot down in flames, but… the reply came back almost immediately hailing me as ‘innovative’ and a ‘genius’! (?) They also believe that they might have quite a bit of ‘traditional’ sculpting work for me in the future! 

So, traditional V Digital Sculpture techniques? You’ll have noticed that I haven’t spilled the beans on exactly ‘what’ my brilliant idea is (it isn’t always a good idea to give your best ideas away!), but I’m so pleased that after my resistance to digital sculpting I have found a way to combine it with the way I work to the mutual benefit of both me and the customer in a faster and ultimately a more satisfactory way. 

Hare sculpture created using traditional sculpting techniques
My Harriet Hare sculpture created in wax using traditional sculpting techniques
Posted on — Leave a comment

Welcome to The Tulip House

<img src="data:image/gif;base64,R0lGODlhAQABAIAAAAAAAP///yH5BAEAAAAALAAAAAABAAEAAAIBRAA7" data-wp-preserve="%3Cstyle%3E%0A%20%2F*%20Style%20Definitions%20*%2F%3Cbr%20%2F%3E%0A%20table.MsoNormalTable%3Cbr%20%2F%3E%0A%09%7Bmso-style-name%3A%22Table%20Normal%22%3B%3Cbr%20%2F%3E%0A%09mso-tstyle-rowband-size%3A0%3B%3Cbr%20%2F%3E%0A%09mso-tstyle-colband-size%3A0%3B%3Cbr%20%2F%3E%0A%09mso-style-noshow%3Ayes%3B%3Cbr%20%2F%3E%0A%09mso-style-priority%3A99%3B%3Cbr%20%2F%3E%0A%09mso-style-parent%3A%22%22%3B%3Cbr%20%2F%3E%0A%09mso-padding-alt%3A0cm%205.4pt%200cm%205.4pt%3B%3Cbr%20%2F%3E%0A%09mso-para-margin-top%3A0cm%3B%3Cbr%20%2F%3E%0A%09mso-para-margin-right%3A0cm%3B%3Cbr%20%2F%3E%0A%09mso-para-margin-bottom%3A8.0pt%3B%3Cbr%20%2F%3E%0A%09mso-para-margin-left%3A0cm%3B%3Cbr%20%2F%3E%0A%09line-height%3A107%25%3B%3Cbr%20%2F%3E%0A%09mso-pagination%3Awidow-orphan%3B%3Cbr%20%2F%3E%0A%09font-size%3A11.0pt%3B%3Cbr%20%2F%3E%0A%09font-family%3A%22Calibri%22%2Csans-serif%3B%3Cbr%20%2F%3E%0A%09mso-ascii-font-family%3ACalibri%3B%3Cbr%20%2F%3E%0A%09mso-ascii-theme-font%3Aminor-latin%3B%3Cbr%20%2F%3E%0A%09mso-hansi-font-family%3ACalibri%3B%3Cbr%20%2F%3E%0A%09mso-hansi-theme-font%3Aminor-latin%3B%3Cbr%20%2F%3E%0A%09mso-bidi-font-family%3A%22Times%20New%20Roman%22%3B%3Cbr%20%2F%3E%0A%09mso-bidi-theme-font%3Aminor-bidi%3B%3Cbr%20%2F%3E%0A%09mso-fareast-language%3AEN-US%3B%7D%3Cbr%20%2F%3E%0A%3C%2Fstyle%3E" data-mce-resize="false" data-mce-placeholder="1" class="mce-object" width="20" height="20" alt="

” title=”

” />

I opened my shop on TBCH last November, so I thought it was about time I wrote something!

I love textiles: the colours, patterns and how you can combine them to make wonderful accessories. Trying to represent nature using fabrics
fascinates me and is a challenge! .

I learned to sew at a young age and throughout my teenage and student years, sewed on a regular basis. Once I began working the sewing more or less stopped.  As a bit of a fabric hoarder I decided to see if I could turn all this
into beautiful home accessories so, about 7 years ago, I made some
tentative forays into the world of handmade but it wasn’t until November 2019
that I decided to make a full time career of it

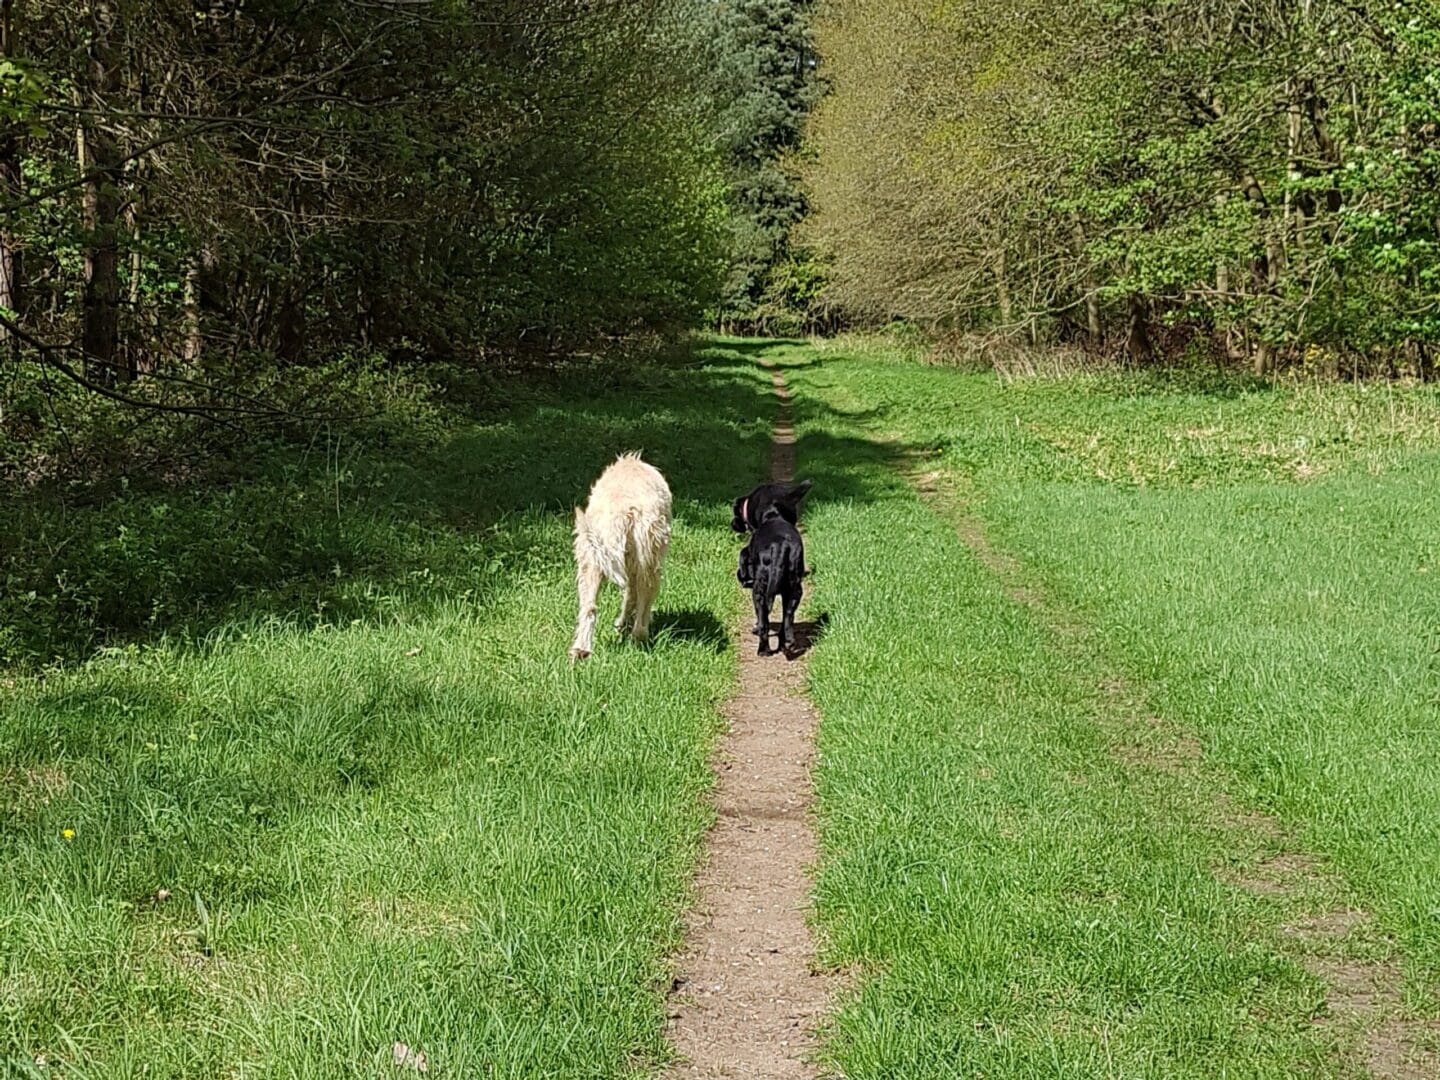
Inspiration also comes from my surroundings. I am lucky to live just a short walk from acres of forests. Great for walking my three dogs (two black Labradors and an Irish Wolfhound) , it is also an area full of wildlife which you can now see reflected in my applique cushion designs. Although every now and then I throw in the odd exotic creature, such as the Australian King Parrot who has recently
appeared in my designs. I have not yet spotted one of those flying around the forest! The wildlife I see is the inspiration for my designs which use a mixture of raw edge applique and free motion embroidery.

I am now in the process of turning ideas into designs and up-scaling my making of those products I developed 7 years ago: the cushions, gloves and bags.

The beauty of my applique cushions is, I hope, not only in the designs themselves but in the fact that they close the loop of any waste textile from the other products I make. Specialising in applique designs I can use the remnants from the gloves and bags in those applique designs.

The starting point for all my products is the fabric. I can have a piece of fabric for years before I decide what to use it for! And sometimes inspiration can be very close to home: I used a cashmere jumper to make my first pair of gloves, for instance.

I aim to design and make beautiful, useful products and something which is a ‘bit different’. Everything is made by me, by hand and nothing is mass produced. Even my more popular cushion designs vary in the fabric made to create the applique, making each one slightly different and special.

Posted on — Leave a comment

How It Started – Meet JoSara

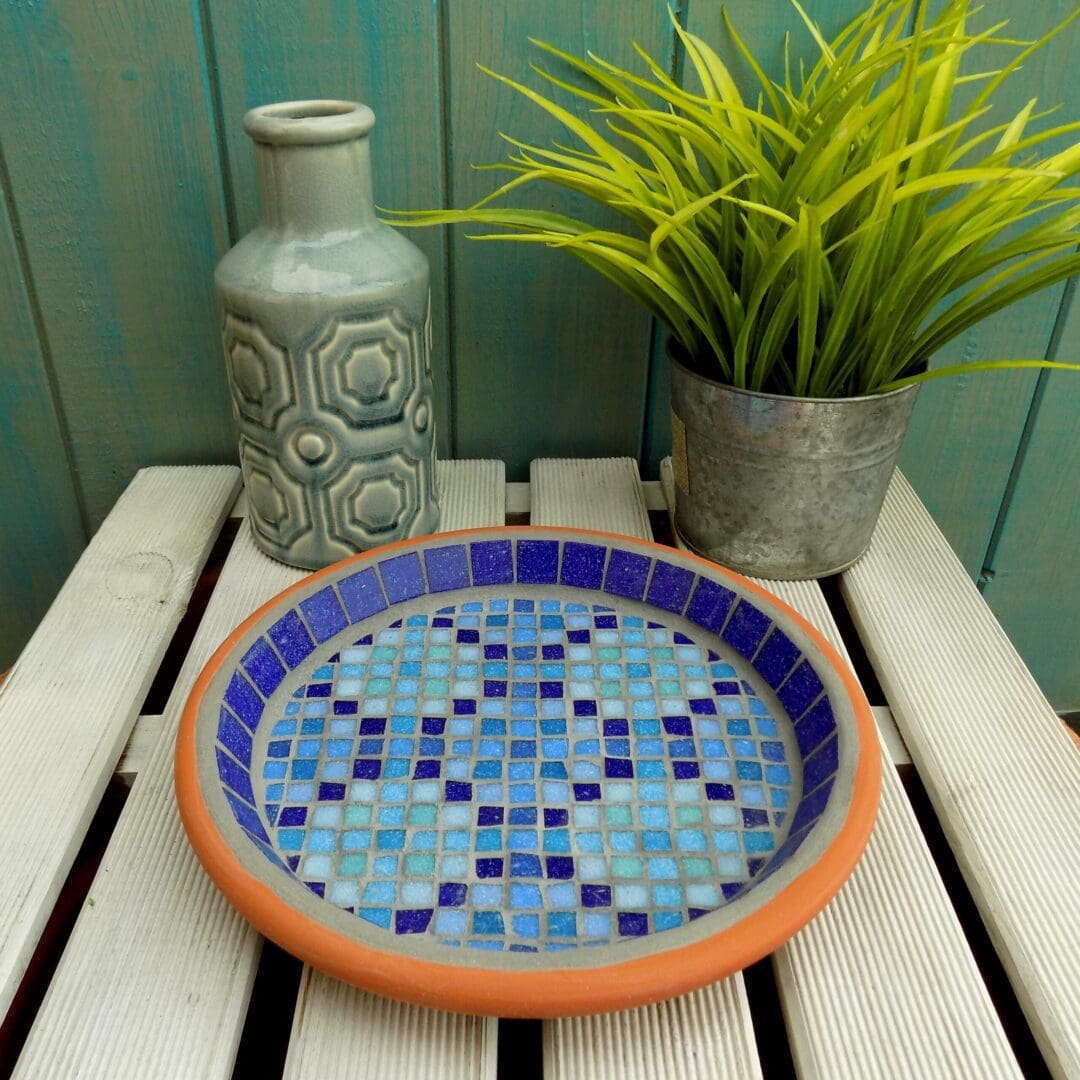
Hi, I’m Jo, thanks for popping in. Where did it start? Well, I was looking for a decorative and practical bird bath for my own garden and I couldn’t find any that fitted the bill. I had seen a few mosaic style designs on my search and I thought, I could have a go at that. So, I researched garden suitable materials, taught myself how to mosaic, and made my own unique pattern Moroccan pool style bird bath (a design that is still one I have in my shop today, and the bird bath is still going strong in my garden). That started me on a train of thought where lots of different mosaic designs I could create were popping into my head.

Those train of thought designs included something to help our hedgehogs, because it was around that time that I became aware of the plight they were in with their numbers plummeting. As I read more on the subject I realised water is key to attracting wildlife to your garden and can be a lifesaver for them, too. So I thought what better? You could have something decorative to look at, while the water it provides is helping keep your garden wildlife healthy and you could also enjoy watching the wildlife that appeared. Seemed a win, win to me.

I have always been quite arty, but never pursued it, I certainly never thought it would become my career. I also have always had a keen interest in the natural world, but never thought of combining the two things until I made that first bird bath and the penny dropped. There must be other people out there that want something a bit more unique for their home and garden too? Fate had it that I was in a position to leave my long term, very dull, admin job and try starting my own business to find out. The timing was perfect with the handmade boom just getting going and lots of information about how to start a handmade business online was appearing on the internet. So my brand, JoSara, was born with my first online shop opening in 2011.

JoSara in Birds and Blooms magazine

Since then it’s been going from strength to strength, including more online shops, a website, and being featured online and in print, with my Three Bees bird bath being in the 5th best selling mag in the home and garden category in the US, Birds and Blooms. And in the US that means a LOT of readers, so that was amazing. My ranges have been expanding, with new designs still popping into my head. And it’s all thanks to the nature and wildlife lovers, and lovers of things a little bit different that were definitely out there.

To follow new designs in progress follow me on Facebook – JoSaraDesign

Posted on — Leave a comment

Making a Polymer Clay Pendant

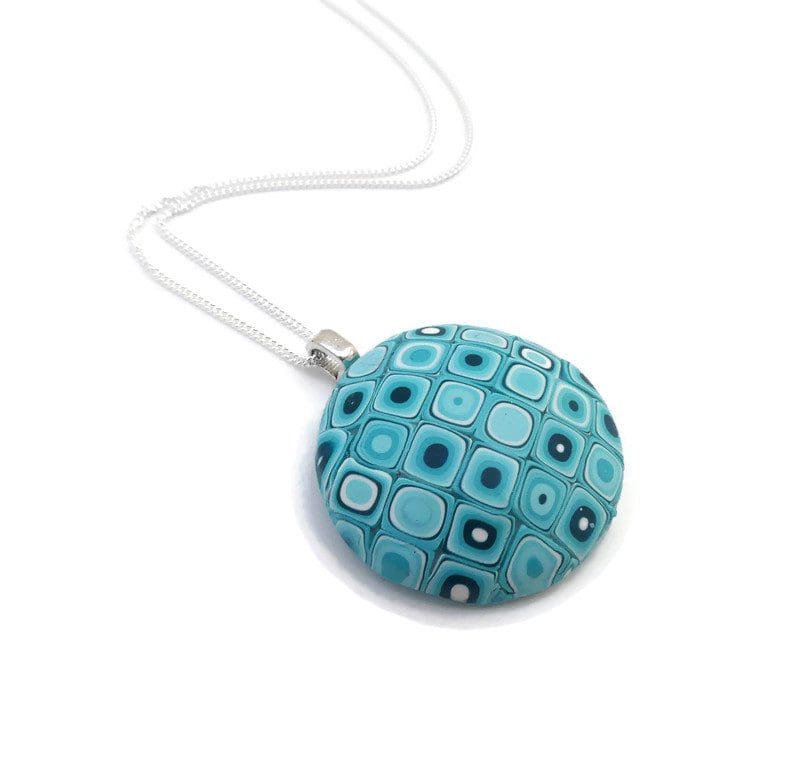
This is another of the basic Polymer Clay styles I first learned ‘back in the day’ and like the Swirlygigs I showed you last time, this one has always remained a favourite too. You never know how they are going to come out so that’s fun! I took some photo’s this time so I can talk you through the stages. This is not a tutorial, but I thought you might be interested to see the stages of work.

blue pendant

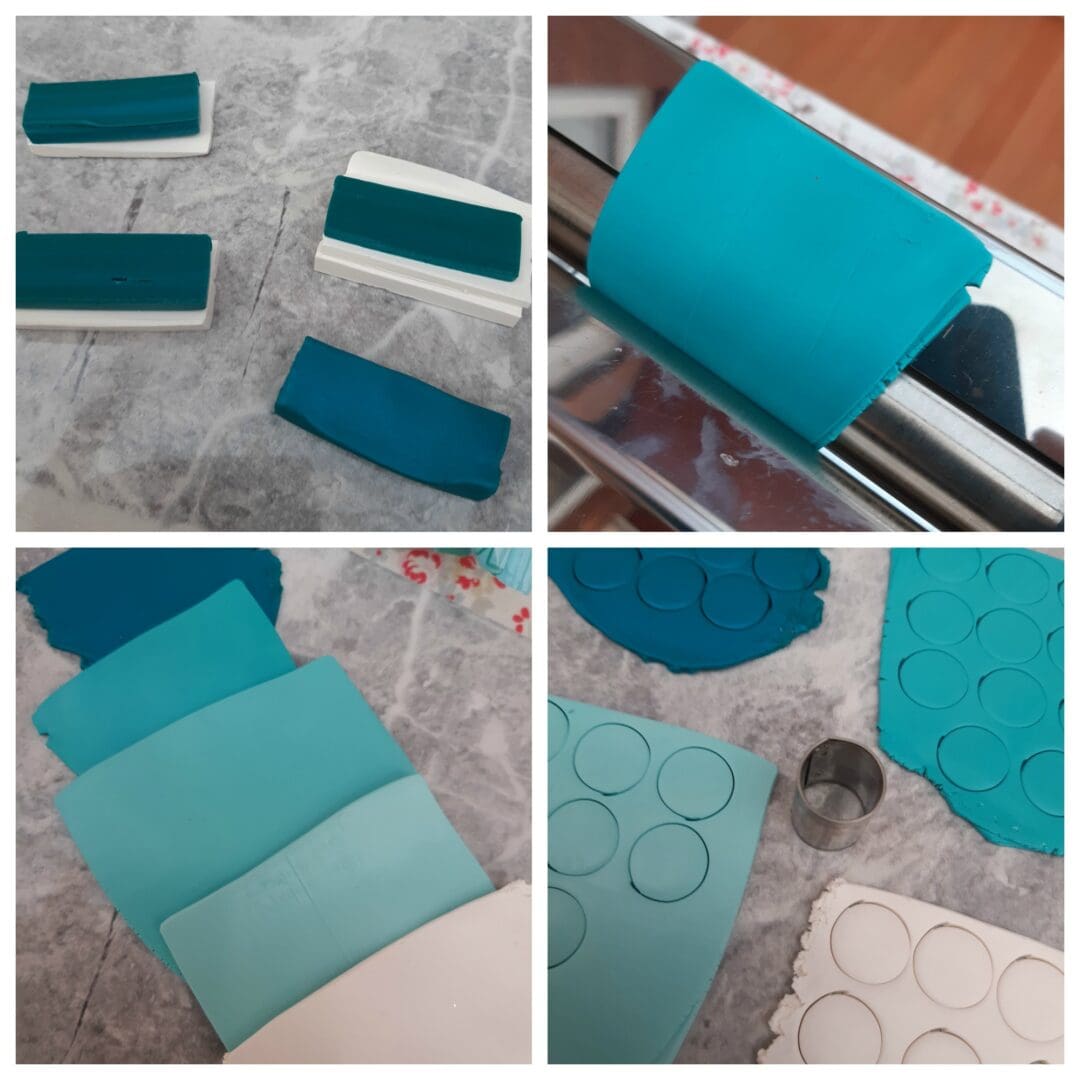
First off I chose the colours I wanted to use and conditioned the clay, that is made it pliable to use. I use a pasta roller for this but you can kneed and roll the clay too if you prefer. I roll a piece of each colour to about 2mm thick.

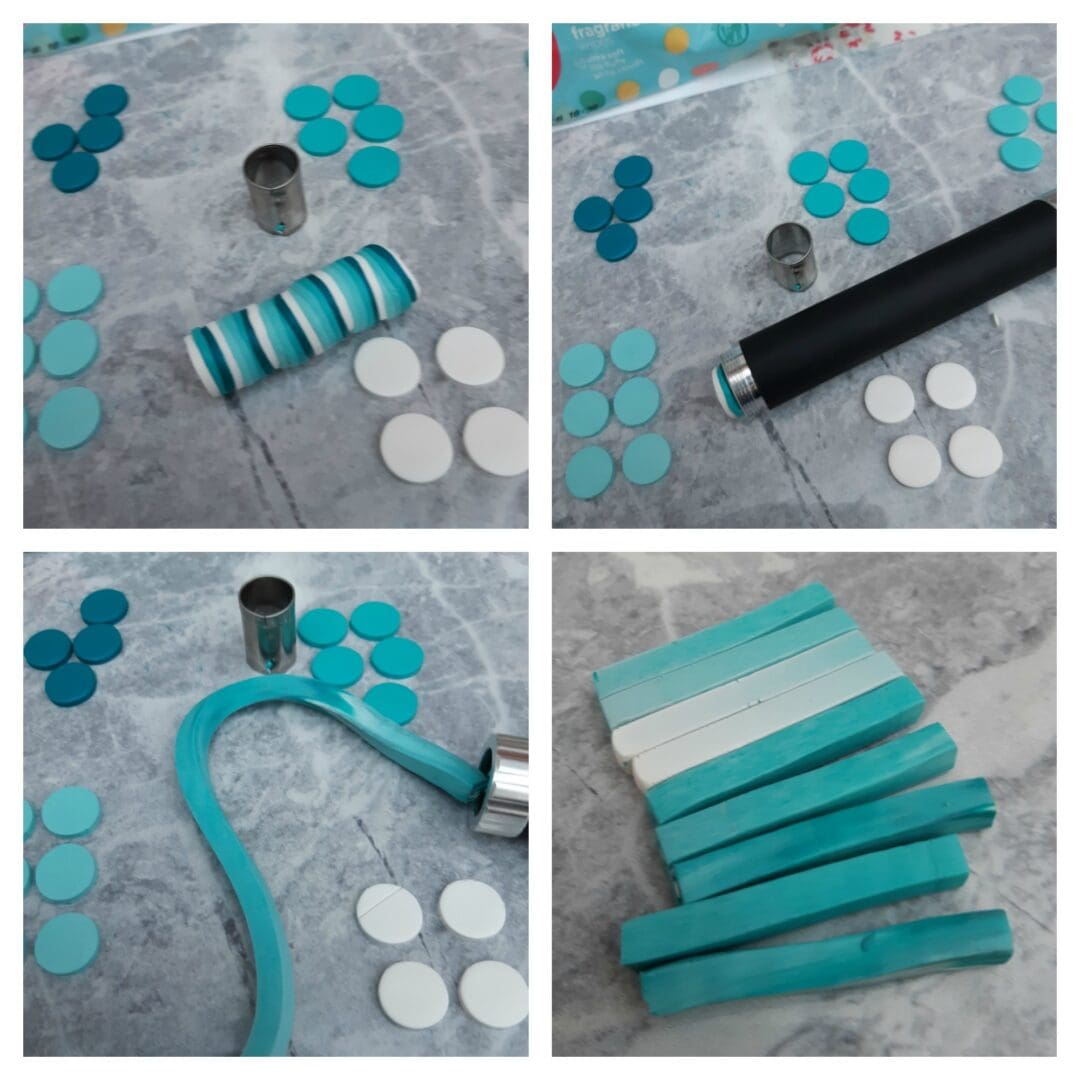
Next step is to cut little rounds of each colour, the size is to slot into the end of the clay extruder, (like a sort of syringe for clay).

Making a polymer clay necklace

Once I have an even number of each colour I stack them to make a long
sausage shape that will slide into the barrel of the extruder. The clay is then ‘extruded’ and comes out in a long square shaped piece. See pics below

polymer clay jewellery making

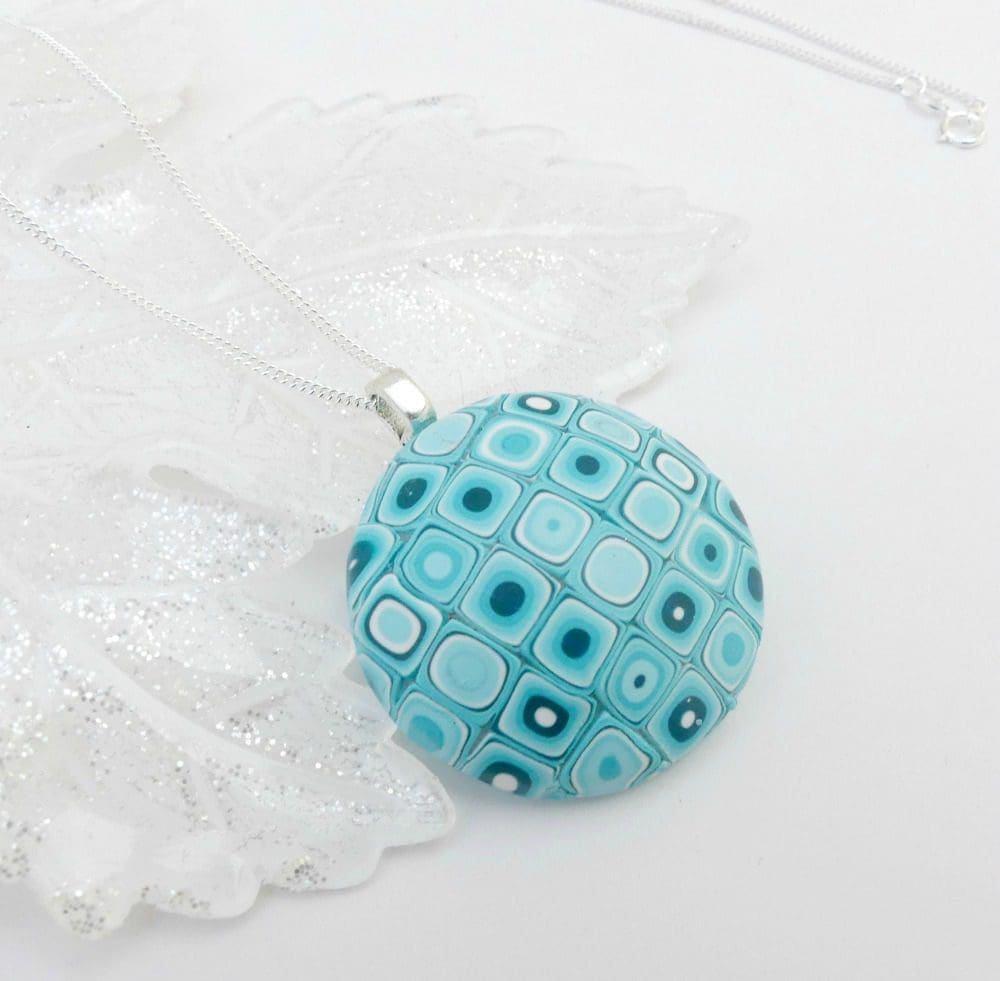
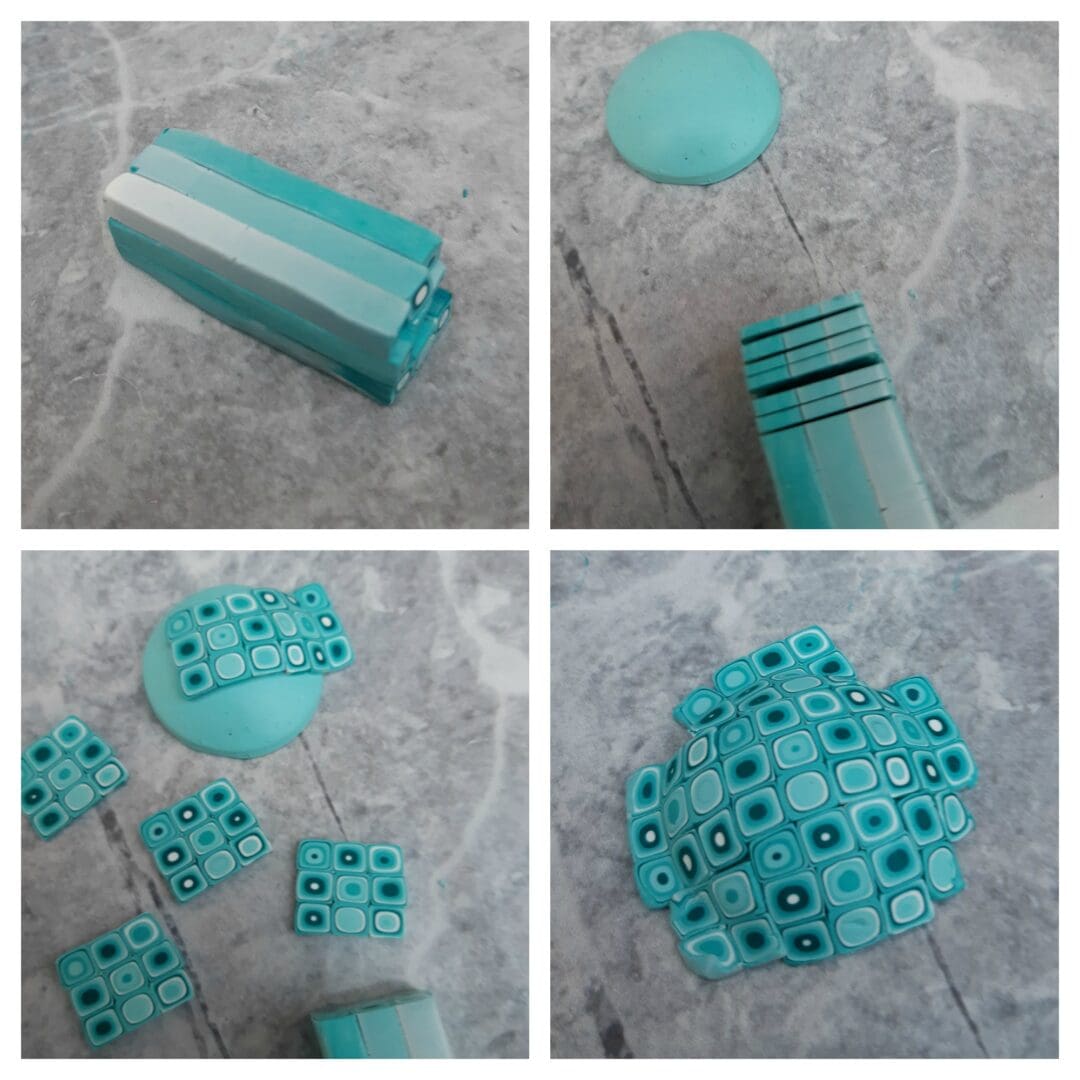
This long piece I then cut into pieces approx 2 inches long, you can see there is a colour variation along the clay. The next step is to stack these little sticks together to make a clay cane. I use 3 across and up to make a square. Then I slice very thin slices from the cane. This is where the magic happens and all the colours pop out in tiny squares, isn’t that fun! I moulded a plain piece of clay into a pendant shape ready for covering with the slices and carefully piece them together across the top to cover it completely.

Retro style Clay Necklace

Then using a large circle cutter I trimmed away the edges to make it neat and tidy.

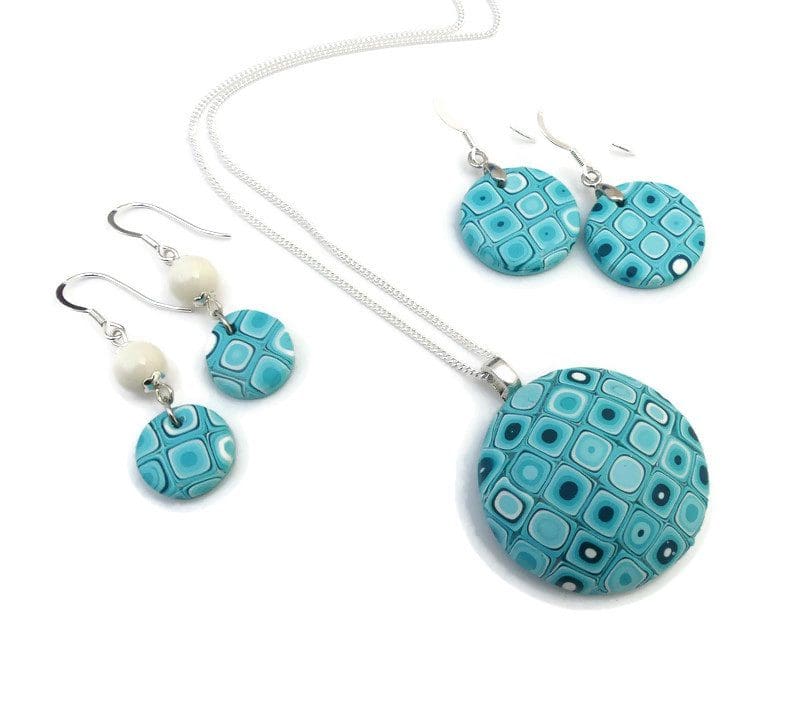
Once it has been baked, it is carefully sanded and given several coats of matt varnish to give it a smooth finish all over. I made some fun earrings at the same time, these pieces are all now available in my British Craft House shop and I will be adding other colours very soon.

turquoise clay set

Thank you for reading! See you next time, Di x

https://staging.thebritishcrafthouse.co.uk/shop/adien-crafts/

Posted on — Leave a comment

Meet the Maker: Crofts Crafts

So, here goes on my first blog post EVER!  And I thought a good place to start would be to share a little bit more about me and Crofts Crafts!

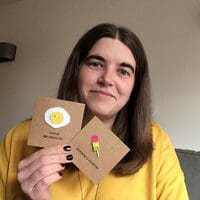
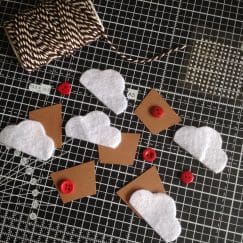
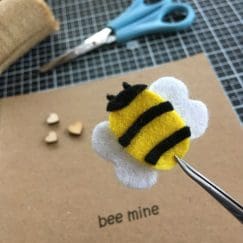
My name is Becky and I currently make greeting cards and gift tags here in the beautiful North Norfolk countryside.   If you’ve checked out my shop, you can probably tell my style is quite minimalist – clean and simple and I try to keep it quite natural and rustic looking!  Most of my cards are made from recycled Kraft card which I print the greeting on myself, and then use a variety of materials to decorate them including felt, hessian, wooden embellishments and twine.  I try to hand make as many embellishments as I can, which can lead to some pretty fiddly work!

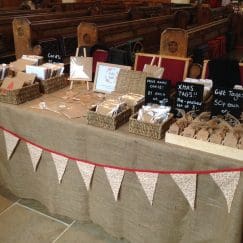
Crofts Crafts Meet the Maker blog - handmade cupcakes in progressCrofts Crafts Meet the Maker blog - handmade cupcakes in progressI started making handmade cards when I moved to Norfolk from London a few years ago.  It started off as a hobby, to send to friends and family, but I found it to be really relaxing and I really enjoyed doing something creative which was very different to the day job!  I slowly started doing a few local craft markets which were great fun, and a brilliant way to meet fellow makers and get involved in the local community.
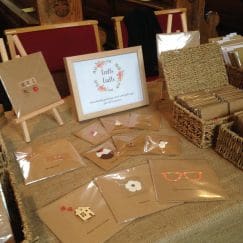
Crofts Crafts Meet the Maker craft fair Crofts Crafts Meet the Maker blog craft fair

I make cards for most occasions, and also have several ‘just because’ designs.  I’m a big believer in encouraging people to connect via good old fashioned snail mail to let someone know you are thinking of them, especially these days when it’s so easy to use technology to connect!  There’s nothing nicer than receiving some happy mail and knowing that someone has taken a few minutes out of their day to let you know they care – especially by sending something handmade!  I’m also trying to make my cards more sustainable and am moving away from using cello bags – I’m a big fan of the Naked Cards campaign…but I’ll save that for another blog post!

My aim for this year was to set up an online shop to try selling to a wider audience, so I was so happy to find, and be accepted to, TBCH.  I love the fact that TBCH is celebrating British designers and makers, and that it is also a relatively new venture (like me!) and I’m excited to slowly grow my shop and get to know other fellow sellers and the TBCH community!

Posted on — Leave a comment

Looking ahead

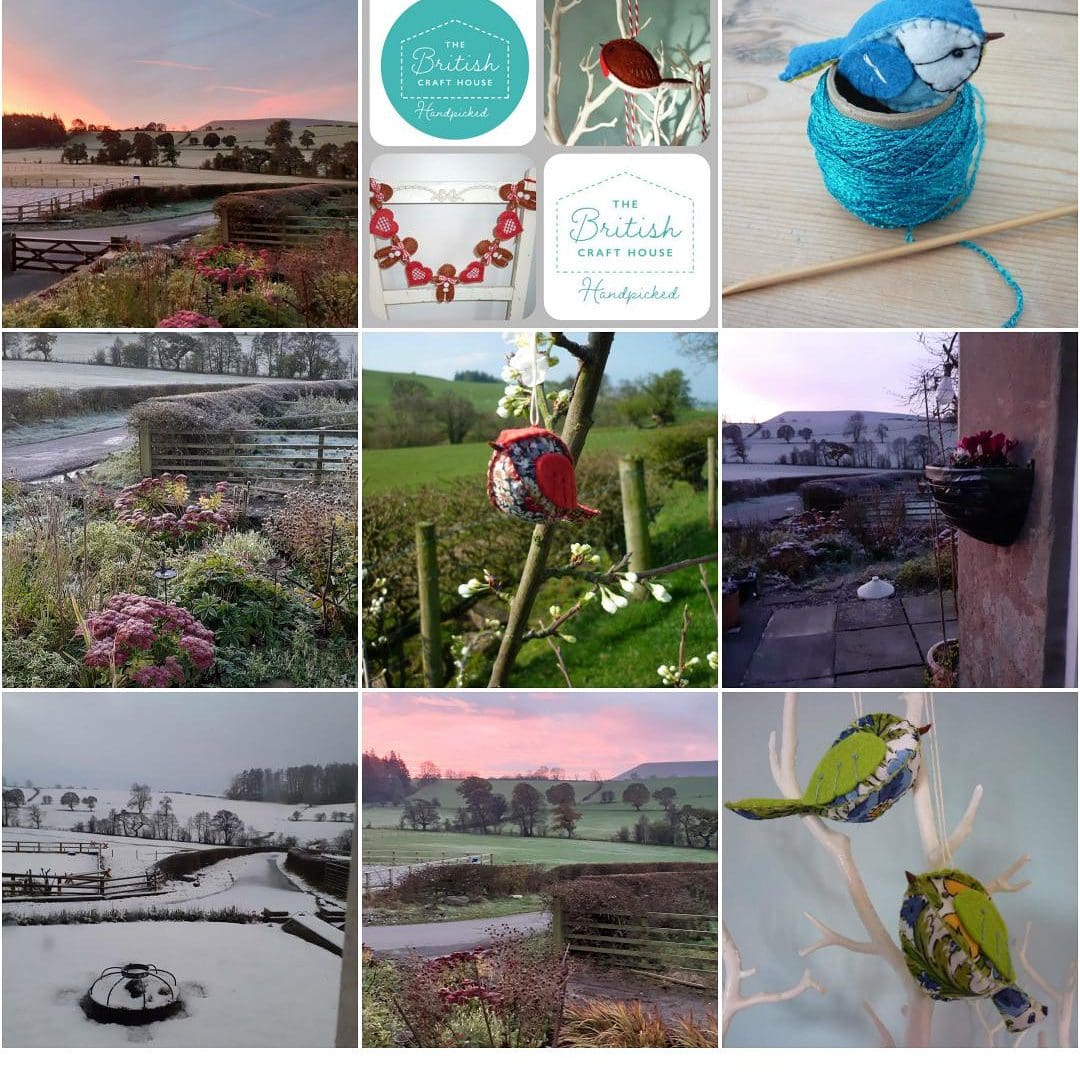
Hello, this is the first time I have written a blog, but it is something I have been interested in doing for quite a while.  I was not sure where to start, so I decided as we are at the start of a new decade to show you what Instagram says is my top posts for 2019, a mix of the beautiful view I am fortunate to have from the garden and also some of my handmade birds.  Included in there is a collage of my first additions in my British Craft House store, being accepted and starting to build my shop was one of my highlights of last year personally and I am so excited to be here and intend to learn all I can. 

WJ Needlework is something that has been growing steadily for me over the last few years and this is the next step forwards.  I will tell you more next time, and may also dig out a photo of me, the are a very rare thing!!

I wish everyone a Happy and Healthy New Year and Thank you for reading.

Wendy x

Posted on — Leave a comment

Metal Window Box …..what will you grow in yours?

Metal Garden Planters Handmade Metal Window Boxes

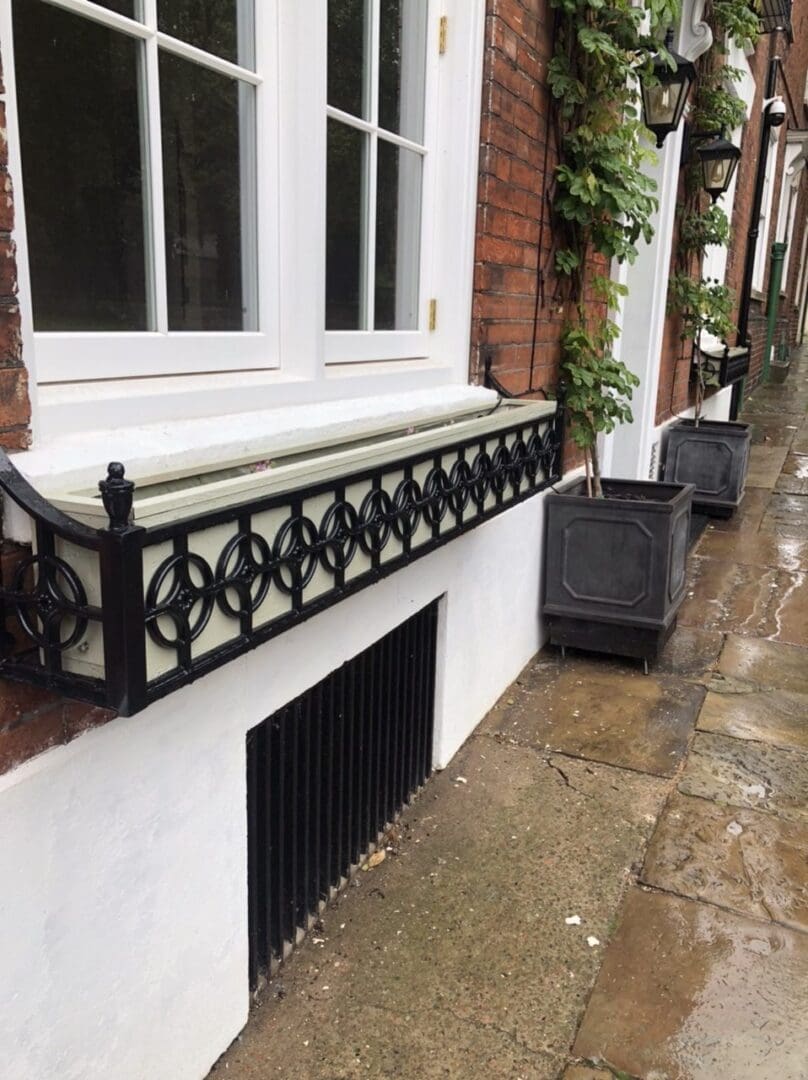
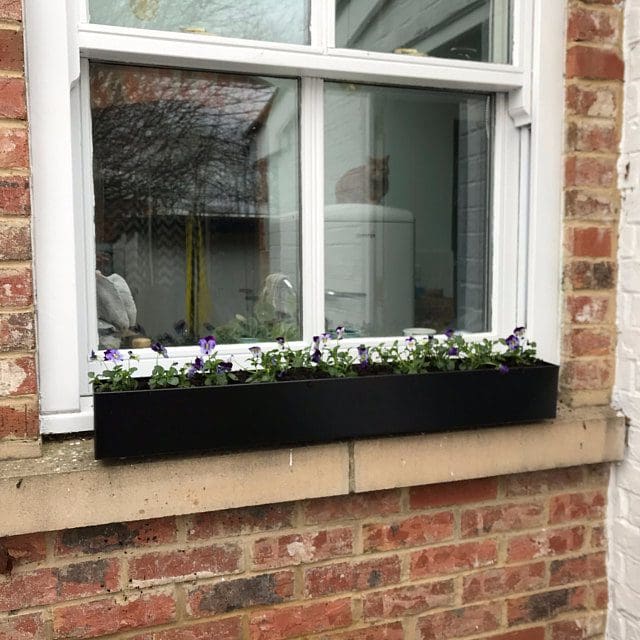
In many towns and villages around the UK you will often see this beautiful ironwork frames sitting underneath a stunning set off windows, usually the sash wooden framed ones, not your modern uPVC triple glazed designed to lock the world out. This image was taken last year, on a damp grey drizzling kind of day, the triple story house in question is undergoing a mammoth refurbishment, formerly a butchers with the thick wooden floor and huge shop windows on one side of the property, and the other corner the image you see attached, the “private” entrance to the living quarters, notice the railings at street level to the cellar, or coal store as it may well of been.  Anyway the reason for my picture…..  whilst this one was made from wood, I can very easily make one out of metal, to sit inside these ironwork frames? I can also make the metal boxes to sit either sit of the entrance door, to plant a clematis or ivy from. 

Of course you don’t need a fancy pants iron frame to hold a window box in order to breathe some life and colour into your windows, you just need a cill – here is an image from a very happy customer who loves gazing out of her kitchen window and seeing some flowers, some colour and not just her neighbours wall 

So, I do take commissions, I always try to manufacture out of the “scrap” pile to reduce our carbon footprint, so if you would like to inject some colour in your window cill, maybe grow some lettuce leaves or have some herbs on your window ledge, do drop me a line and let me help you get growing! 

Posted on — Leave a comment

About Me & Nature by Day

Hi,

I’m Dee also known as Debz. I make unique handmade silver jewellery which is inspired by Mother Nature’s amazing textures and designs. All my work is made by hand, by me, from Silver Metal Clay which is 99.9% pure silver and is a recycled material, I’ll tell you a little more about this amazing medium below.

How it all started

I started making jewellery several years ago after my twin sister bought me a Metal Clay course for Christmas. I immediately fell in love with this fascinating process and knew this was what I was destined to do.

I’ve always been creative and fascinated by the worlds flora and fauna. I went to Art College way back when, but I failed to follow my creative heart for my career and instead worked in luxury retail for over 25 years. While working with some of the worlds most beautiful luxury products, I always dreamed of one day being able to share my own designs and creations with my own precious customers and now I am through Nature by Day.

My Collection

Mother Nature is the greatest designer of all, nothing a human can create is more beautiful than that of nature and this is why I try to recreate natures designs. Sea shells dominate my collection. I’m passionate about them not only because they are among some of the most remarkable designs found in nature, but also because of their spiritual and magical powers which have been used throughout time all over the world. Shells are linked with the feminine energy, where shells are used to draw the things you desire into your life. Each shell or symbol of a shell brings and possess it’s own bit of magic so my silver shells make the perfect gift for every woman if they need a bit of extra power and magic in their life as well as a beautiful piece of handmade jewellery.

Metal Clay is the perfect medium for capturing every intricate detail that Mother Nature puts into her gorgeous designs. I make every item individually by hand so every piece is unique in it’s own little way. All the findings and other components I use to make my finished pieces are made from Sterling Silver. 

I make your orders in my lovely home in the Herefordshire countryside that I share with my Scottish husband Ken and my little rescue dog, Tahira.

My real passion is creating and making commissions or personalised designs for you, my customers, there is nothing more gratifying and humbling for me than to make that special piece of jewellery that you can treasure forever.

All my jewellery is beautifully gift wrapped in my eco-friendly branded gift boxes tied with ribbon so they make perfect gifts for every occasion or just a treat for yourself! I’m also happy to add a handwritten note if you want me to send something directly to a friend or loved one.

I welcome orders from all over the world.

Commissions

Did you find a shell on a special holiday or on your honeymoon that you’d love made into silver? Does a loved one have a special tree or plant that you’d like a permanent piece of to wear? If so, I’d be delighted to create a customised and personal design for you, so please don’t hesitate to get in touch with me or if you simply have a question about my jewellery please email me at: deeyoung@naturebyday.com.

Silver Metal Clay

Metal Clay is exactly that, silver in clay form, tiny little packets of clay. The clay is made from tiny particles of reclaimed silver mixed with an organic binder and water. You can shape, mould and sculpt the clay like you would with any other type of clay.

The clay is then dried, once dried you can refine it further by sanding, carving, filing etc. until you have the perfect piece. The clay then needs to be fired in a tiny little kiln. 

Once fired you are left with pure Fine Silver which is classed as 99.9% pure verses Sterling Silver which is 92.5% pure.

Once fired you can then use normal silversmithing techniques such as soldering to complete the pieces. 

The last process like with any jewellery is polishing, I use 7 different steps, all done by hand to polish all my pieces to ensure I don’t lose any of the lovely detail.  

Thank you for reading my about page.

Happy browsing and shopping,

Dee.